

It’s Minus Forty Six Degrees in NY.
Happy New Year! It’s freaking cccold! I think we’re setting records here on Long Island. Global Warming my ass! I’d like to punch Al Gore in the face right now… So, let’s talk about something related to heat. Radiator covers! Woo hoo! A fascinating topic that I’m sure you can’t wait to read about!
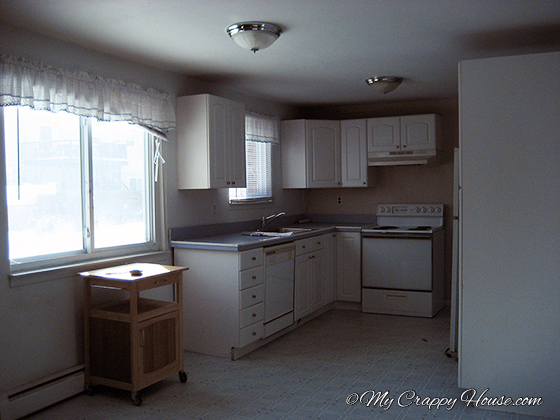
 Here are a couple of pics that go way back to when I first bought my crappy house 2 ½ years ago and immediately ripped apart the whole thing. You may remember I had delusions of putting it all back together in 8 weeks. I digress…
 I’m not really sure you can tell from that top picture, but the old radiator covers were disgusting. Under one radiator was a hypodermic needle and a tampon. Both unused (good thing or I would have had to move), but still… Ew.
If you read my “about” page, you’ll remember I said I didn’t intend to teach you anything. I guess I lied. Get ready to learn something…
 Radiators come two ways: with or without the heating element, also known as the Sharp Ass Hot Part. I already had the Sharp Ass Hot Part, so I got what are called “dummy” covers from Slant/Fin. They come in the box assembled. You need to remove the Unstable Cover (which, as its name implies, will fall off by itself), snap out the Slanty Strip, and remove the F’ing Brackets, which are the little bitches that support the Sharp Ass Hot Part. I dropped a lot of f-bombs (sorry, mom) trying to pry those damned things out. If I had man hands (thankfully, I don’t), I might not have had any trouble, but my weak little woman hands could not budge those F’ing Brackets. Here’s where I really do teach you something.
 Clamps are awesome. (You should definitely buy some clamps because you’ll use them for all sorts of stuff. I got this set from Home Depot for cheap.) As you can see, if you squeeze the top of the F’ing Bracket with the clamp, the bottom comes free from The Back Plate. I am ridiculously smart. Eventually.
The next step is to put the F’ing Brackets behind the Sharp Ass Hot Part. You want to avoid touching the Sharp Ass Hot Part because it’s sharp. And hot.
 Now you can slide The Back Plate behind the F’ing Brackets. I will eventually (hopefully before I die) be installing hard wood floors, so I have The Back Plate sitting on scraps of ¾ inch plywood to leave space for that. I’m an optimist.
 If you haven’t already found your studs, now is the time. Here’s mine…
 Ha ha. Just kidding. That’s my boyfriend, Paul
 Stud Rudd. Anyway…
 Now you want to drill holes through The Back Plate so you can screw it to the wall into the studs.

 Once that’s done, you’re ready to squeeze your F’ing Brackets back into place. Use that clamp trick I taught you. You’re welcome.

 Now all that’s left to do is snap the Slanty Strip back in and attach the Unstable Cover. Note: The Unstable Cover will keep falling off. If you somehow manage to get it to stay, you should avoid eye contact and back away slowly. No sudden movements. You think I’m joking.
The end caps are so easy to install that I didn’t even mention them until now. Just slide them on. Two seconds. Done.
 These two walls are getting the brick love treatment. Installing these covers was the last thing I needed to do before I could start tackling that monster project. Believe me when I tell you, you’ll never forgive yourself if you miss that post. Subscribe!

10 Comments
Scribbler
You are intrepid! I really admire your moxie.
My Crappy House
That is the first time I’ve ever been called intrepid! I like it! Thanks
Mom
LOL….believe it or not it wasn’t until the clamp that I realized the bracket was F’ing and not Fling. Your blog makes my day. Still LMAO
PS in spite of the f-bombs, which thankfully I never hear, I couldn’t be prouder of you.
My Crappy House
Thanks, mommy. You’re an f-bomb free zone
Taylor
I’m not sure how I got to your blog (typical) but I’m so glad I found it. I’ve read about 15 of your posts so far whilst “working” so I’ll save the rest for when I’m at home. I must tell you that I am a 100% devoted reader now that I know we share a love of Paul Rudd, aka, my boyfriend
My Crappy House
Whoa whoa whoa. Whoa! Your boyfriend? He’s already committed to me. In the unlikely event that I tire of him, I may be persuaded to relinquish him to you, but the chances of that happening are even less than the chances of me getting a kitchen this year. And how sad is that? I don’t even have a kitchen and now you want to steal my boyfriend? Have a heart!
Maria Colatarci
I have lived in TOO many houses with those slant fin things. Hate’em. They have negative design quality. And are not good with cats.
Why are slant fin things not good with cats, you ask. You can’t move the furniture all the way to the wall and so one’s kitty will continually bat things off of the dresser into the crevasse. Solution: find a whole lot of similar cardboard boxes and securely tape them to the back of the furniture to serve as spacers to block the hole. You can tape them so they won’t show.
They still make the room smaller.
My Crappy House
I’ve actually had baseboard heating my whole life. I quite like the function of them – forced hot air is very dry. Do they look nice? Well, no, but I just ignore them. Once there’s stuff in the room, they sort of “go away” for me.
Tina Raasch
Now that I have forced air heat…. I truly miss my baseboard heat! I miss it all… the sharp ass hot thing the unstable covers, even the f’íng brackets. Now I have an unending battle with dust; floating, settling, dancing dust. When I had radiant heat I dusted (maybe) once a month. Now once a week isn’t enough… Once you get all your projects done and the construction dust is gone… it will be worth it. Keep posting! One day this Blog may pay for your projects!
My Crappy House
My cousin (the one I’m always mentioning on the blog) told me I didn’t want forced hot air and he was right. I actually don’t mind the look of baseboard and my house is really comfortable! And I never even thought about the dust. That’s another plus!