

I Turned a Spare Bedroom into a Dressing Room
It’s More Than a Closet. It’s a Sanctuary.
What do you do when you’re somehow amazingly able to find an affordable house with three bedrooms and you really only need two? Well, duh! You turn that superfluous bedroom into a dream closet, of course! A dressing room. How many people actually get to have their own dressing room? Celebrities. Rich people. And me!

My Crappy House has three bedrooms; one to sleep in, another to work in (I made it into an office) and the third is now my dressing room! I’m very proud of this room because everything you see in here was done by me and no one else. I painted and papered the walls, hung the shelving, built the drawers, hardwired the chandelier, put up the crown molding, installed the door trim, sewed the curtains… everything!
It didn’t happen overnight. I took my time – especially with the projects I was unfamiliar with. I had never built drawers before or installed crown molding, but my patience was rewarded. At the risk of sounding conceited (and I’m OK with that), this room is freaking awesome. Sometimes I come in here just to get away from the rest of my crappy house and marvel at my wealth of talent and skill.
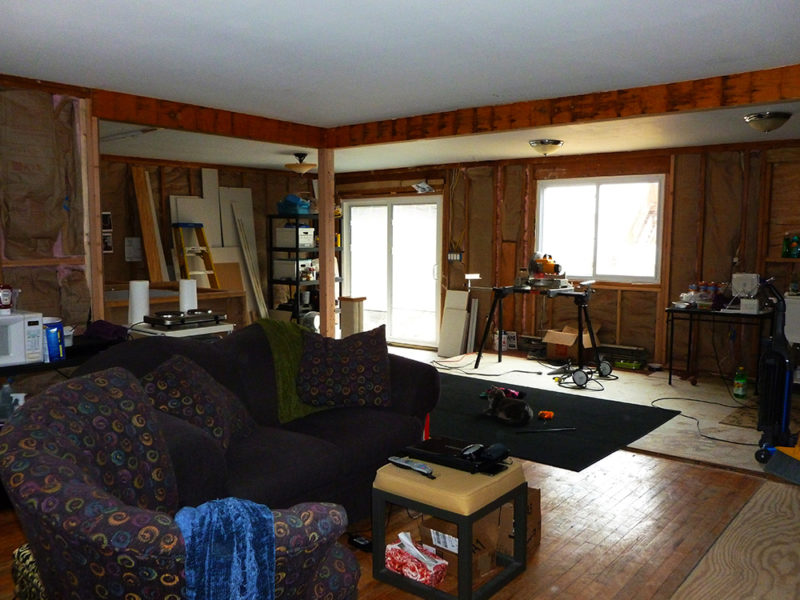
So, let’s start at the beginning. This is how the room looked before I started.


It’s a small room – only about 80 square feet. Really small for a bedroom, but it’s the perfect size for a dressing room.
The first thing I did was pick out a wallpaper. I didn’t really have any specific colors in mind, but I knew I wanted a damask pattern. I shopped around online and found some beautiful papers, but they were ridiculously expensive. (Fact: The people who can afford those papers also have the expensive cable TV package, central air conditioning, and do not live in crappy houses.) Plan B was to check out Lowe’s and, wouldn’t you know, I looked through their books and found this:

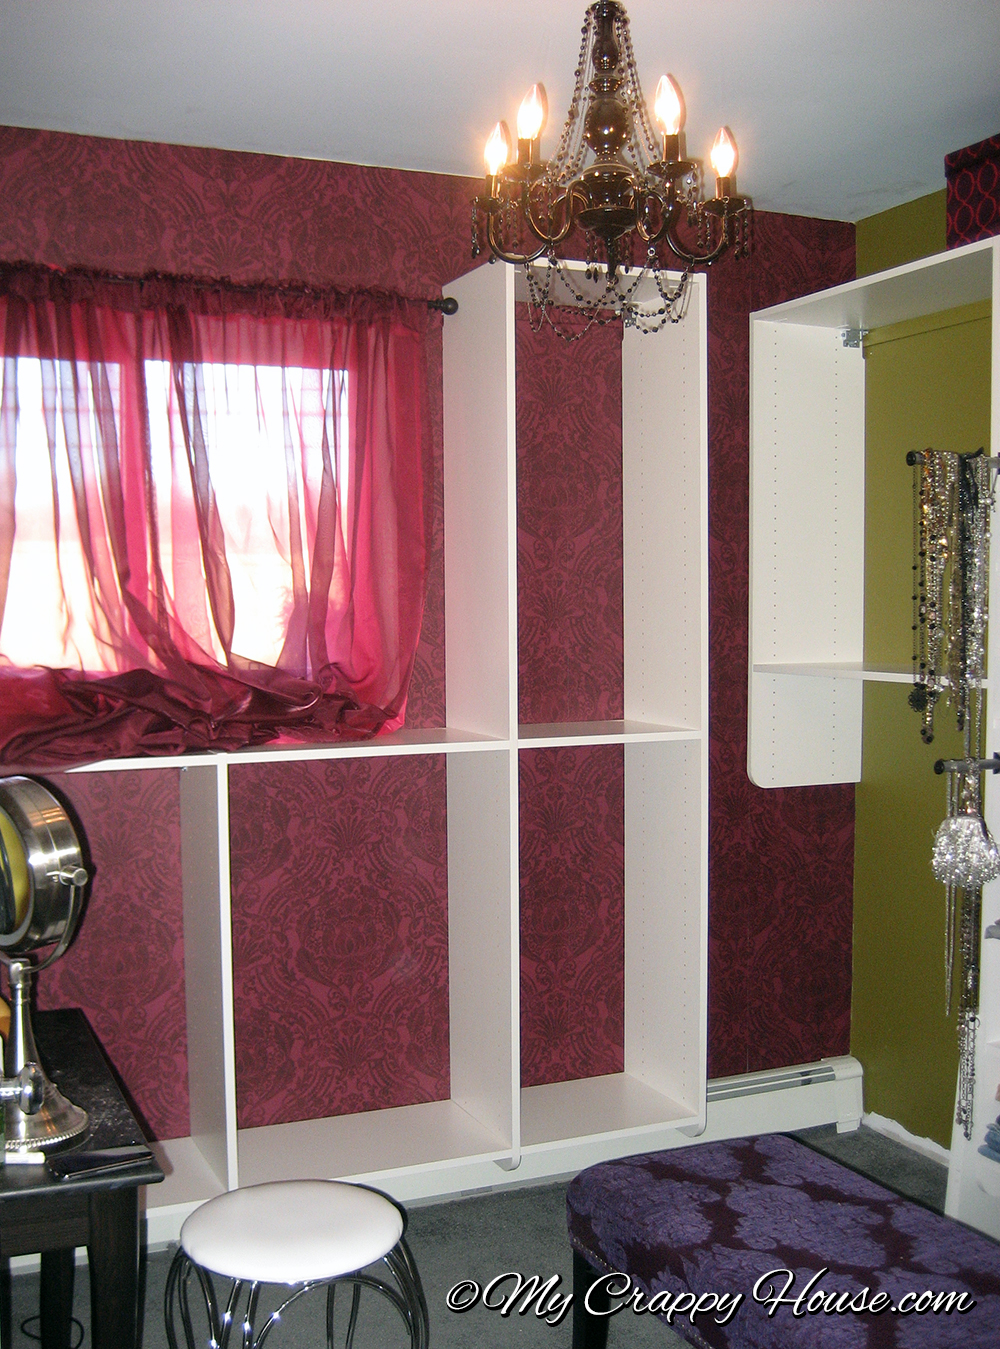
An affordable, berry-colored damask. For paint, I went with its complementary color, which is a muddy, yellowish green. I wanted the room to be dramatic and using complementary colors is a great way to achieve that. (I’m not wrong. Look it up.) This is a room that will mostly be seen just by me (and the bazillions of you!), so I felt free to go a little crazy. I chose Newt, by Benjamin Moore. (You can see below I also considered purple, but I wasn’t feeling it.)

I found this bench at TJ Maxx after I had already installed the wallpaper. Can you believe it? The background color in the fabric matches it perfectly, and the pattern is that exact purple I initially considered for the walls. What’re the odds?
 Egor took a liking to it immediately. Luckily, just for lounging, not for claws.

The next step was to install the closet shelves. I had a closet system in my old apartment that I was smart enough to take with me when I moved, so that was a nice head start here.

(Guys, never use flash photography when you’re trying to show what something actually looks like in real life. I’m so sorry these pictures suck, but wtf did I know? I was so young and naive back then…)
This closet system used to live in a typical six foot closet in my previous apartment. (You know, the kind with those crappy sliding doors.) It was a great start, but not enough to fill the whole room.

Look at all this empty space! I needed some more closet parts. (You’ll notice I had hung the chandelier at this point. I made this chandelier myself by adding candlesticks and jewelry to a crappy brass fixture. I’m so clever! You can read all about that project here.)

At the time I was working on this closet, I was employed at a place that had its own wood shop and a wicked expensive computerized router called a CNC machine. I measured the closet parts I already had, designed the rest of the closet, and made a program for the CNC to cut the new pieces to match. It worked out perfectly and I only had to pay for the cost of the materials. I know not everyone is lucky enough to have access to such technology. All I can say is, that really sucks for you.
I built drawer boxes from a kit and ordered the faces and slides from a local cabinet company. The handles are from Amazon. I’m surprised they’re so inexpensive because they’re made really well.
Truth time. This part was difficult. In order to get drawers to line up perfectly, there’s a lot involved. Measurements need to be spot on so the drawer faces overlap the top and bottom shelves and they’re properly spaced. You’ve got to be good with the maths.

The first step was to build the drawer boxes and install them (faceless) with the slides. I then pre-drilled handle holes through the faces, and also a couple of extra holes through the front of each box. (You can kinda see those in the picture above. Probably only if you’re under 40.)
Then, one at a time, starting from the bottom, I clamped a face to a box in the exact right spot and drilled through those handle holes into the box, thus making sure the handle would also be in the exact right spot.
The last step was to put a couple of screws through those other holes I drilled (from inside the box) so the handle wasn’t the only thing holding the face on.
You’re probably impressed right now. And, honestly, you should be. There are a lot of ways to mess this up and I didn’t do any of them. In your face, drawers! (Ha! Terrible pun. I’m leaving it.)

The very first time I installed trim was in this room. I started with the door casing and I was a bit over-zealous with the nail gun. I won’t ever do that again. Every freaking hole you make is a hole you have to freaking fill, and, the truth is, you just don’t need 100 nails to install door trim. It’s not going anywhere. Live and learn.
You can also see my seams aren’t the best, but I fixed that with some patience and a bit of wood filler.
OK, mostly wood filler.
I put off installing the crown molding for a while because I had never done it before and I didn’t want to mess it up. Then, one night, at about 7 p.m., I decided to just go for it. (For some reason, I feel productive in the wee hours.) Of course, I pick a room with weird angles for my very first crown install ever. It was challenging, but by 4 a.m., I was feeling pretty freaking great about myself.
(FYI, people don’t like it when you call them at 4 a.m. to brag about your accomplishments. Just so you know.)

(Your eyes don’t deceive you; that is a blue ceiling. At some point, I painted my ceiling Ice Blue, by Benjamin Moore. You might think it looks weird in the pictures, but it looks really good in person.)


Finishing touches included painting the doors, crown and trim black, shortening the curtains and adding weighted edging to keep them properly “pooled” (that window is one of Egor’s favorite spots), and adding a zebra rug. Here’s how it all turned out.


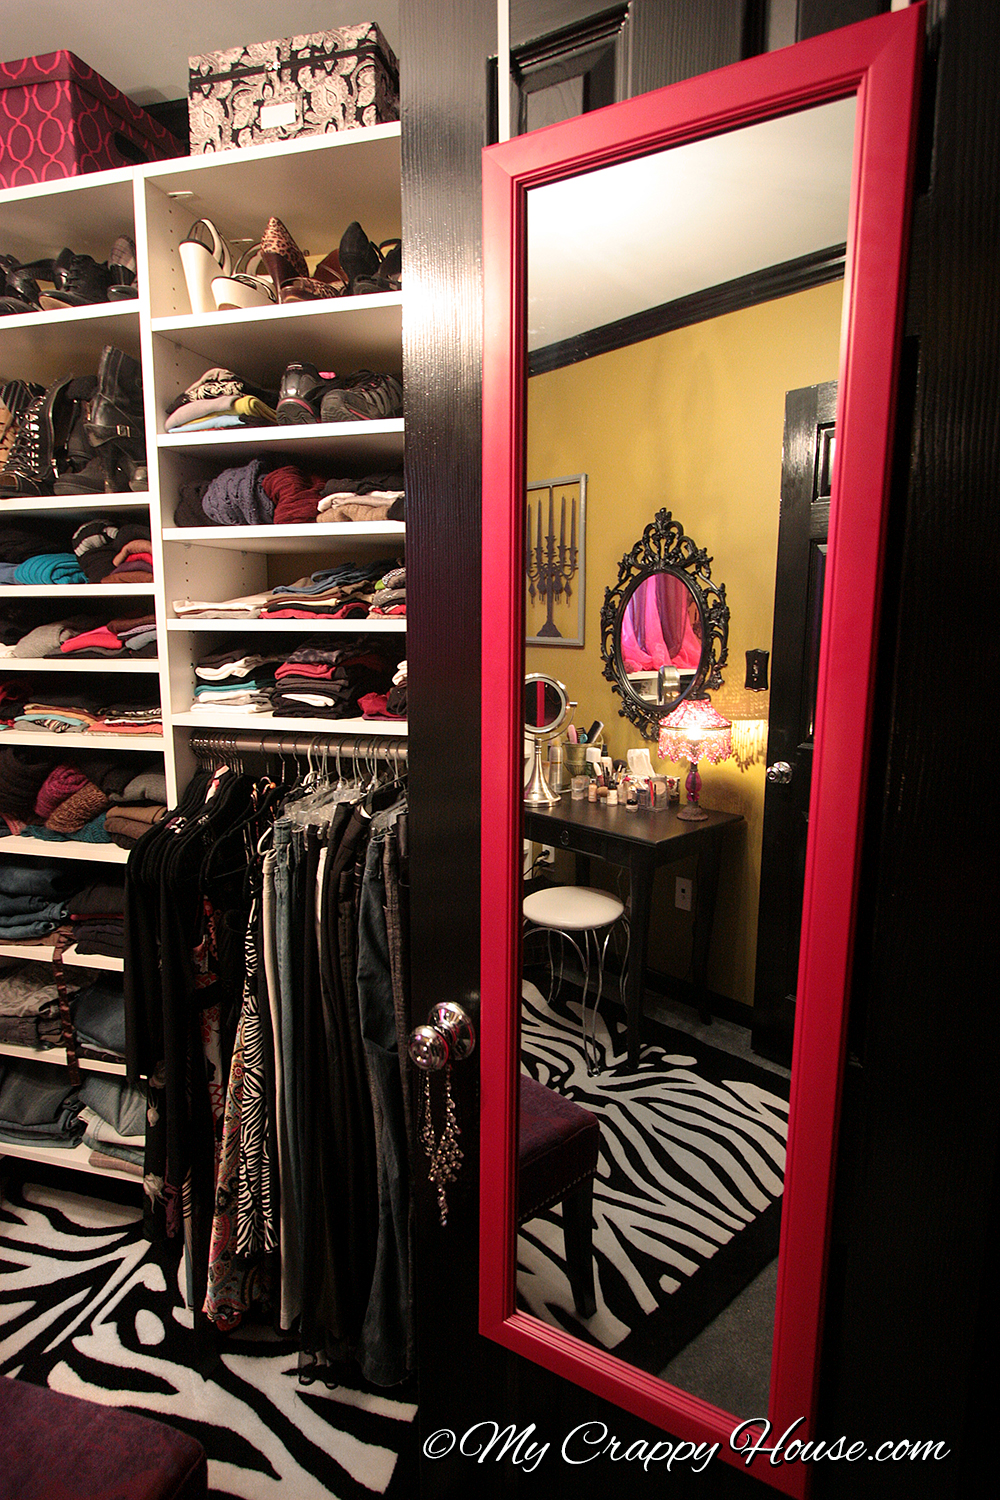

So, there you have it. My fancy dressing room. Don’t be jealous. You are more than welcome to live vicariously through me. In fact, you should subscribe below so you remember to come back often! If you liked this post, please share it with a friend.


28 Comments
Bonnie (@bonteach)
I love your dressing room! So elegant and so looks like one a celeb would have
My Crappy House
Thanks! I like to pretend I’m J.Lo when I’m in here.
Victoria Tims
Peek a boo Egor! Love this room! So does Gia, she thinks you are cool!
My Crappy House
Smart girl
Bill
Sure that’s not 90ft square?
My Crappy House
That would be one BIG ASS ROOM! 9ft square means 9ft x 9ft. You’re thinking 9 square feet, which is only 3ft square – really teeny tiny. This room is 81 sq ft.
Marilyn
This is such a magnificent room! I can’t believe you did this with no outside carpenters! Do you realize the money you have saved!! You are one strong young lady!!
My Crappy House
Thanks! Being poor is fantastic motivation to DIY.
Missy
My favorite room so far…LOVE the Egor picture.
My Crappy House
Thank you! This is one of my favorite pics of Egor, even though it makes him look a little girly…
Denise in Sunny Las Vegas
Great job! Gutsy color choice. It looks amazing.
My Crappy House
Thank you! I figured this was a good room to go bold in…
Lisa
I want to move it to your closet. I’ll sleep on the bench, no worries.
My Crappy House
As long as you promise to keep it clean in there, I’m OK with that.
Lisa
Move IN to your closet. IN. Argh.
Tania
Wow! You are so awesome, I have two left thumbs and I’m not very handy so haven’t attempted anything close to this. It came out beautifully and it’s the perfect size for a walk-in dressing room.
My Crappy House
Thank you so much!
Ferris
I love this. This gives me great ideas for my closet. I’m in the process of designing it. I don’t make drawers or hang shelves or any of that kind of thing. Impressed that you do, though.
My Crappy House
Thank you! Yeah, building drawers is not easy, but you might consider adding a piece of furniture into your design and building around it. This way you get the drawers without the hassle of making them from scratch. Good luck!
Beth pitcoff
I remember back in Elementary or Jr. High, I envied how incredibly artistic you were… You are very talented. This is just beautiful…and you did it all by yourself.
My Crappy House
Thank you, Beth! You just brought me back to Mrs. Dower’s class in Tremont
Scribbler
I found you through VEB, one of my favorites. You did the most fabulous job on this dressing room — a girl after my own heart. I am going to subscribe to your your blog. Come see me sometime!
My Crappy House
Hi Scribbler! I’m not sure what (or who?) VEB is, but I’m glad you found me! I took a quick look at your blog. Your front entry decorations look great. I will be back later when I have more time to peruse
My Crappy House
lol I just decoded VEB… In case anyone is reading these comments, that’s victoriaelizabethbarnes.com. A very funny woman who blogs about restoring her old Victorian house…
Dee
I like your blog but it takes forever to load… no idea why, the background maybe? the pics don’t want to load…. makes me sad I have to wait so long for every post I want to read. beautiful job though, I have a spare room I plan on turning into my dressing room so this is an awesome inspiration!! (coming over from AT)
My Crappy House
Hi! Yes, unfortunately (or fortunately for me), the post on Apartment Therapy has brought HUGE amounts of traffic to my little site and it’s buckling under the weight. I would love for you to read my blog – I bet if you come back late tonight, or wait a few days, it will be normal again. It usually loads fast. Thanks for visiting!
Stephanie
I’m so glad to have found your blog. I needed some “relative” inspiration. I’m a single lady who just bought a crappy, work in progress home too that’s about the same age as yours…AND I am ballin on a budget. Pics of luxurious (or normal for some), “I paid $20K to have my bathroom remodeled” homes doesn’t always inspire me. Everyone thought I was crazy and still look at me sideways (for buying THIS house), but I wanted the creative challange and saw its “potential”. So thank you for letting me know that I’m not alone (we’re kindred spirits, I think). Also, thanks in advance because I plan to steal shamelessly from your creative repertoire. #alreadysubscribed!!!
My Crappy House
I love hearing from kindred spirits! You’re not alone! Not everyone “gets” it. Some people just think I’m crazy. Others think women shouldn’t buy crappy houses by themselves. I didn’t realize there were still so many chauvinists around. Some of them relatives. (Lucky me!) But whatever. The beauty of buying a crappy house is, while it may take a lot longer to finish, it will be exactly what we want it to be when it is. Thanks for subscribing!