

How to Replace Outdoor Furniture Webbing
Those lazy, hazy, crazy days of summer…
Lazy. Hazy. Crazy. I identify with all three, but only one resonates with me on a subatomic level. It courses (very slowly) through my apathetic veins. It naps in the depths of my languid soul. If I were a rap star, my name would be Lay-Z. (Although that sounds vaguely dirty, so maybe not.) If I were a cat, I would lie in the sun with my head in my food bowl so I could eat without having to move.
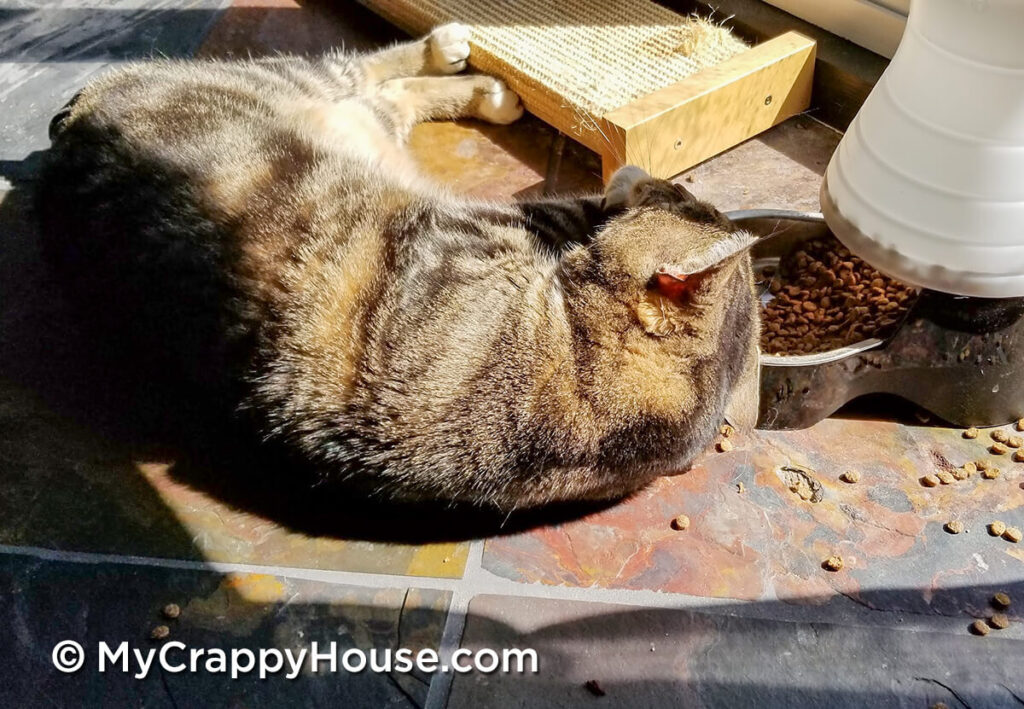
OK, you get it. I’m freaking lazy. It’s taken me two years to write this post about outdoor furniture, but here it is. Because, you know, now that summer is officially over, it makes perfect sense to start talking about outdoor furniture.
Plot Twist…
Actually, it does make sense! This is the time of year people start getting rid of their crappy outdoor furniture so they don’t have to store it all winter. They sell it for dirt cheap online or at garage sales, and sometimes they even put it out at the curb with their trash for someone to haul away for free. That someone could be you!
Two years ago, I found this set on Facebook Marketplace. A sofa, two chairs, and a coffee table, made by Cape May Wicker, selling for $250.
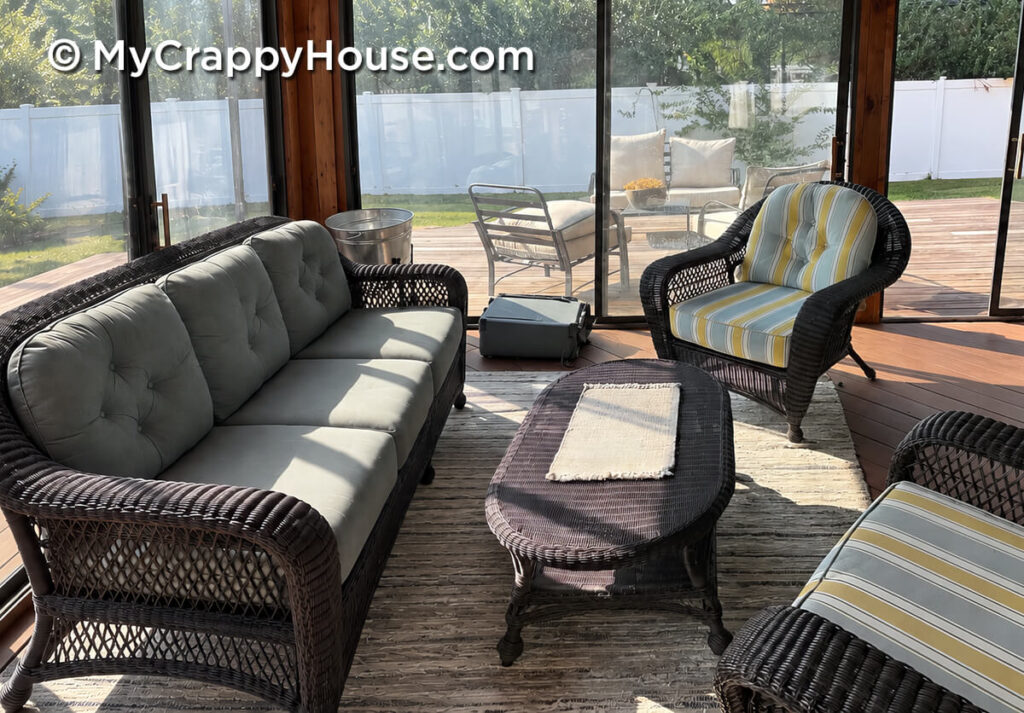
The set needed some work, but if we were to buy it brand new, it would’ve cost us $3,000. (Plus tax!) We did not have three thousand dollars plus tax. We had just spent most of our dollars building our fancy deck, so $250 sounded pretty darn good to us.
How Crappy Was This Furniture?
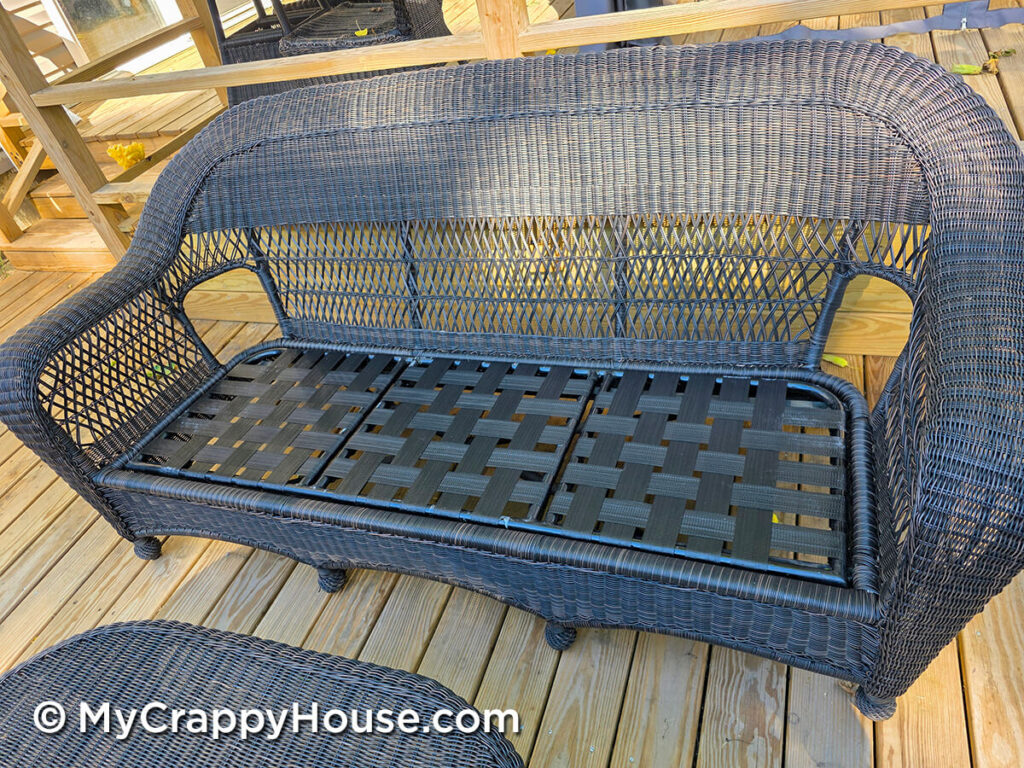
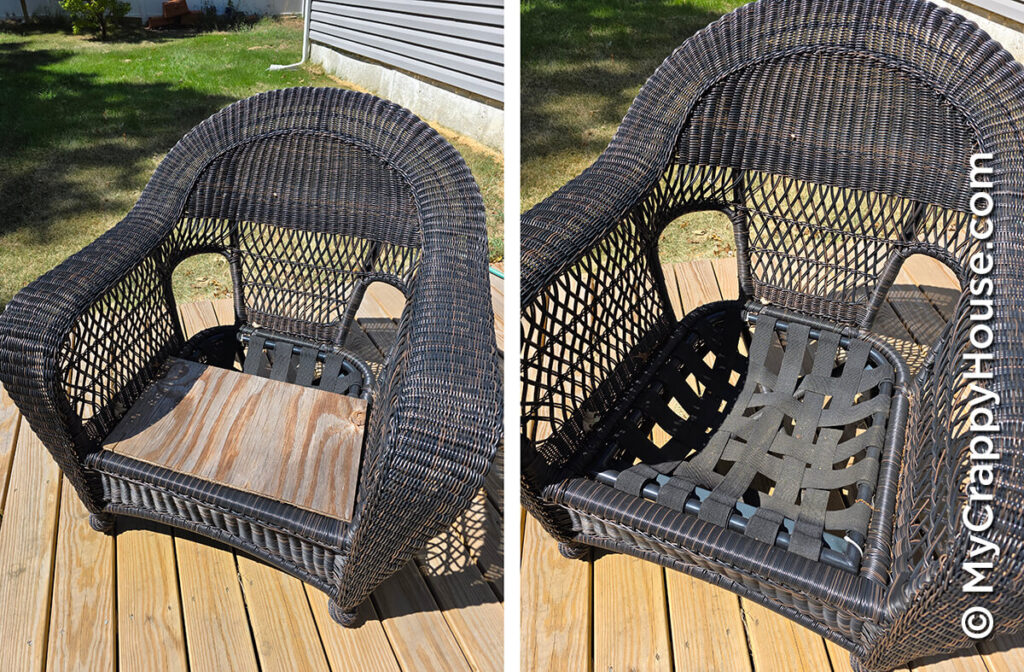
The wicker (arguably the essence of the furniture) was in perfect condition, but the cushions were in rough shape and the webbing under them was completely shot. The previous owner, a duct tape enthusiast, came up with this solution…
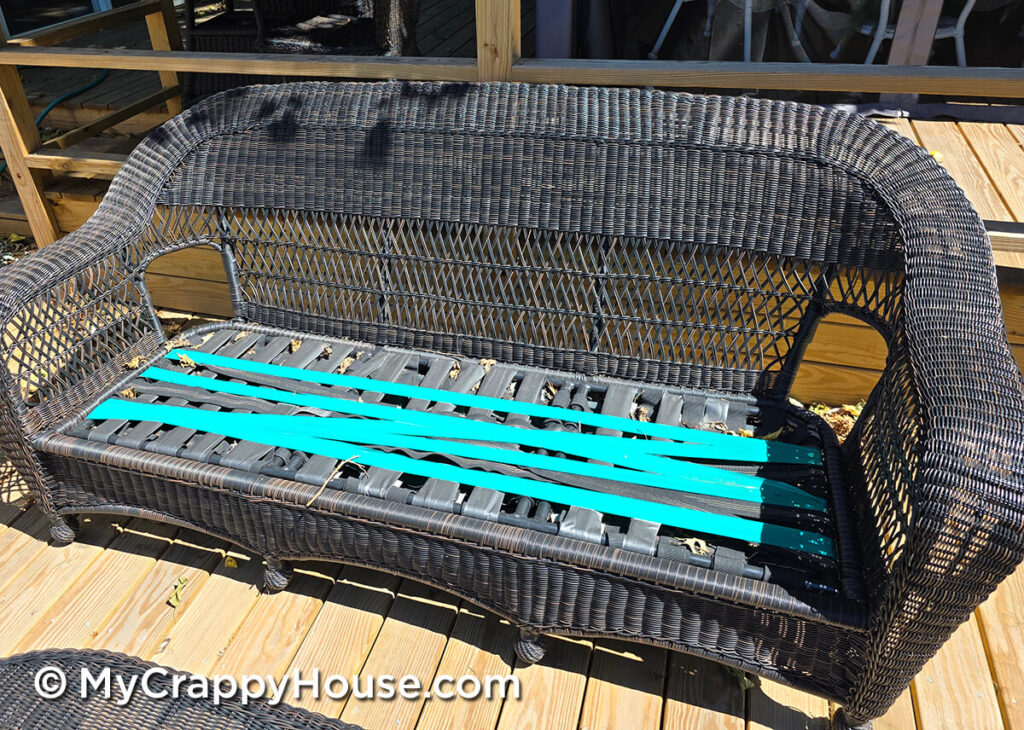
Not what I would have done. (Men and their duct tape…) But hey, guess what? At long last, we have arrived at the point of this post: How to Replace Outdoor Furniture Webbing! I know firsthand there is not enough content on the interwebs telling you how to replace webbing, so here I am.
To save the day.
With my webs.
Just like Spider-Man.
Why Do Good Webs Go Bad?
Have you ever experienced the death of the elastic waistband in an old pair of (super cool and totally stylish) pants? Like you stretch out the waist to put them on and you hear the elastic make this ominous creaky-cracky noise as the waistband takes its last stretchy breath? And it stays all big and wavy? All lifele-… um, snapless, I guess?
Just go with it.
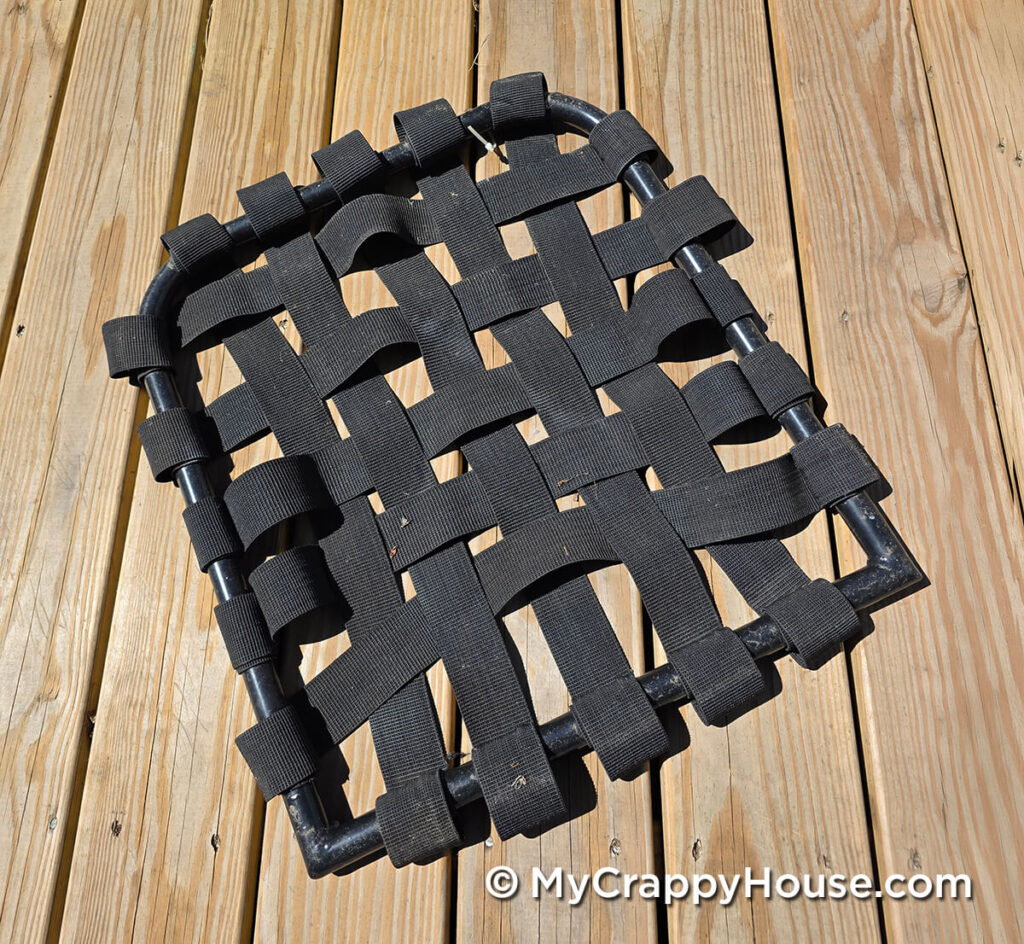
Now imagine you left a brand new pair of (super trendy! I believe you!) elastic pants outside in the sun for a few years. What do you think might happen to those?
Nothing good…
UV rays and time are the enemies of elasticity. (Just ask my face…) So why do outdoor furniture companies insist on using elastic webbing? I can only speculate that they want your pretty new furniture to have an expiration date. Otherwise they might never get any more of your pretty money.
(I’m saving my pretty money for my pretty facelift…)
So How Do We Fix It?
Remember this chair from your childhood?
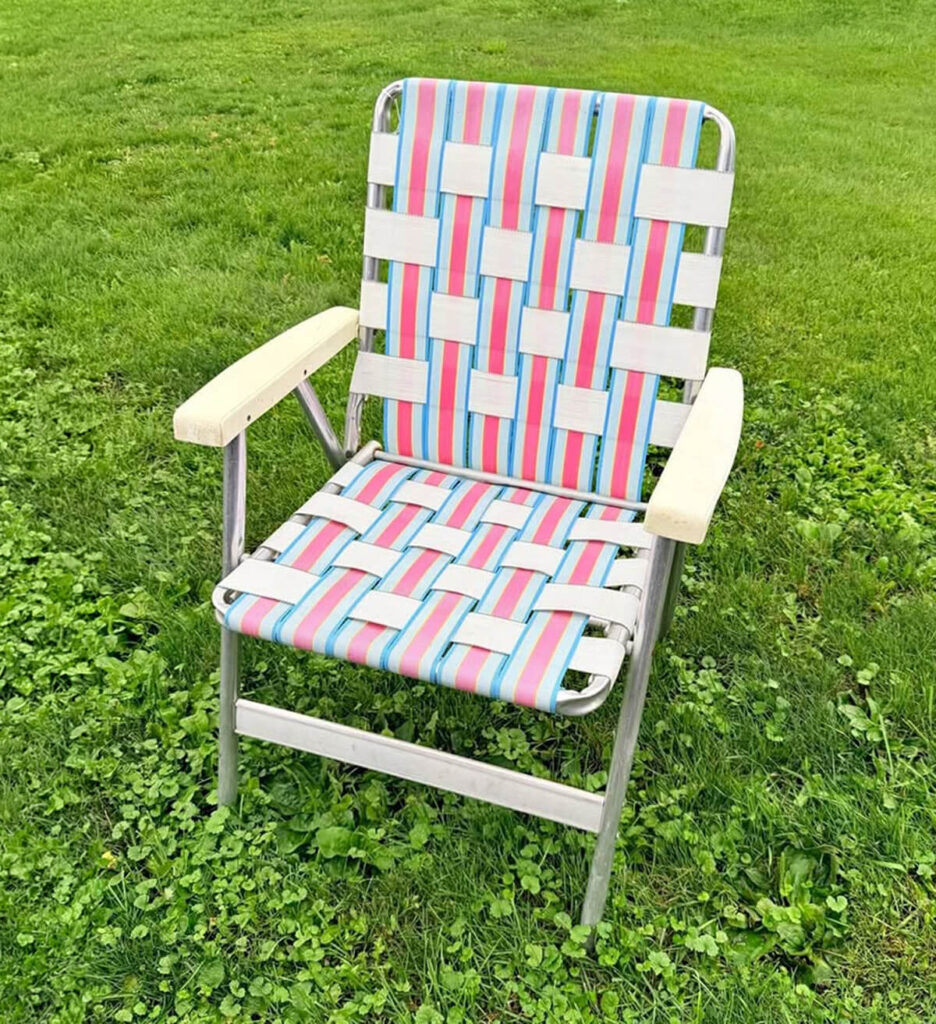
Maybe you still have it. Maybe you even still use it. (Hey, remember when companies didn’t make their products disposable? Ahh, those were the days…) They had this woven plastic webbing that maybe got a little sun-bleached over time, but still had no trouble supporting your hiney year after year after decade.
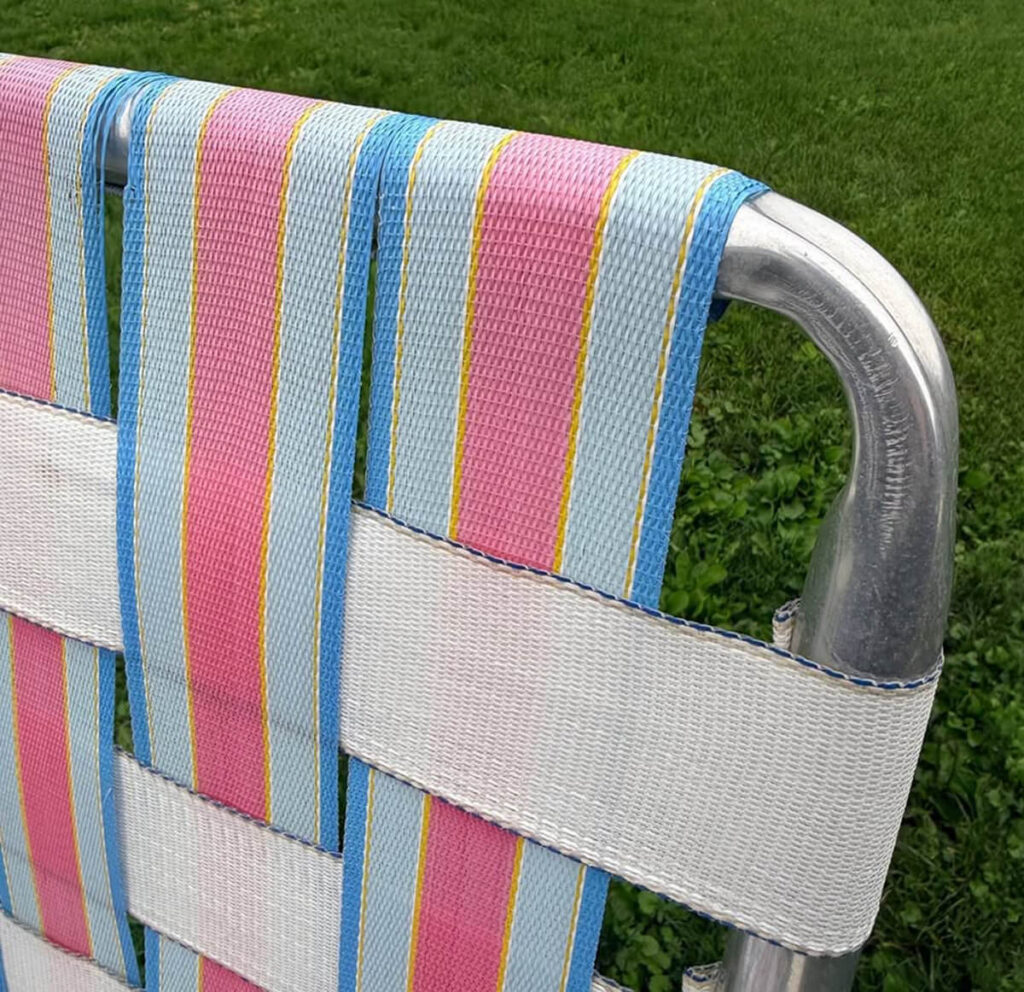
This webbing is what we will use to fix our thrifted outdoor furniture.
Well, not we, of course. I have already fixed my outdoor furniture, thank goodness. I don’t envy you, friend, but the good news is once you do it, it should last for decades. You’ve got this. I believe in you.
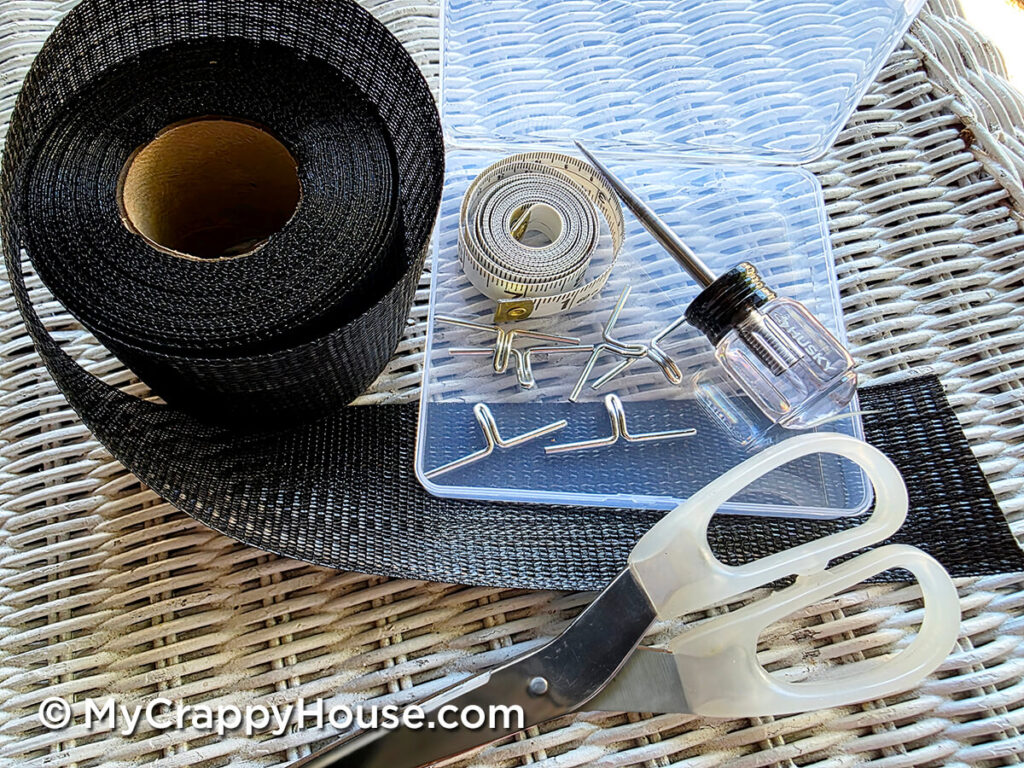
Here’s What You Need
- Roll of polypropylene webbing
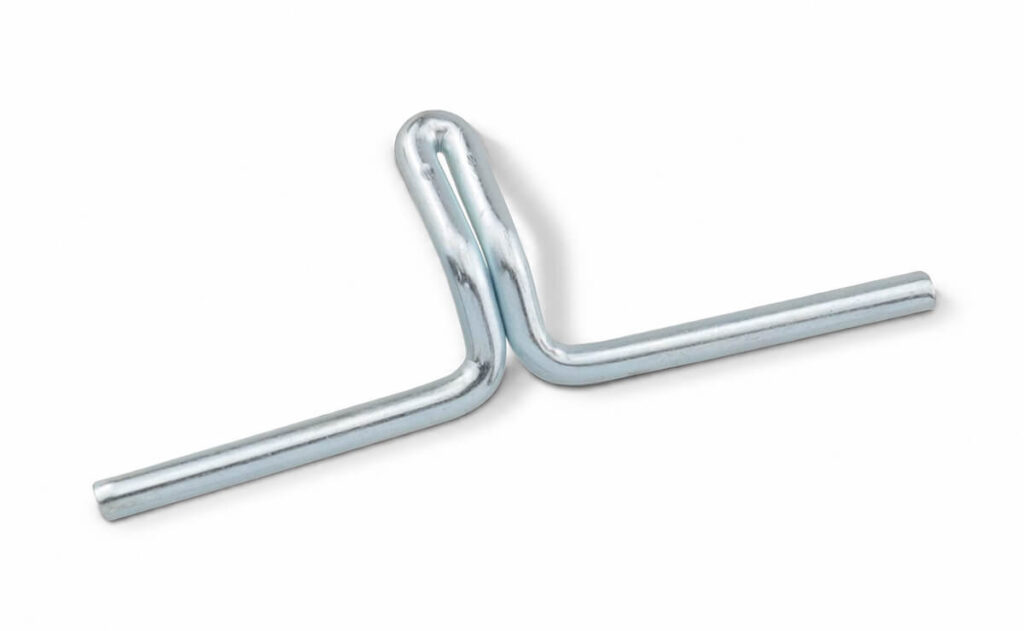
- Lawn chair webbing clips
- Soft measuring tape
- 7/32″ drill bit for metal
- Awl
- Hammer
- Scissors
- Utility knife (optional)
- Masking tape
- Pencil or marker
Here’s What You Do
Use your scissors or a utility knife to remove any duct tape (or whatever brilliant solution your furniture’s former owner may have devised) from the frame, as well as the factory-installed elastic.
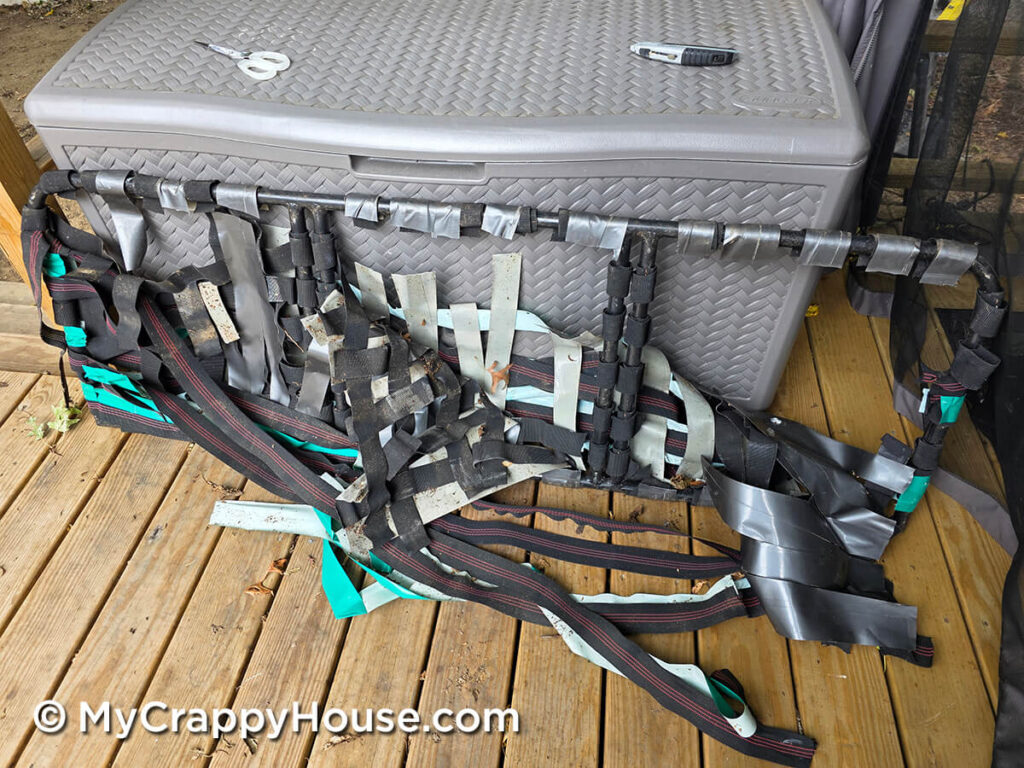
My elastic was attached with staples.
So freaking many teeny tiny staples.
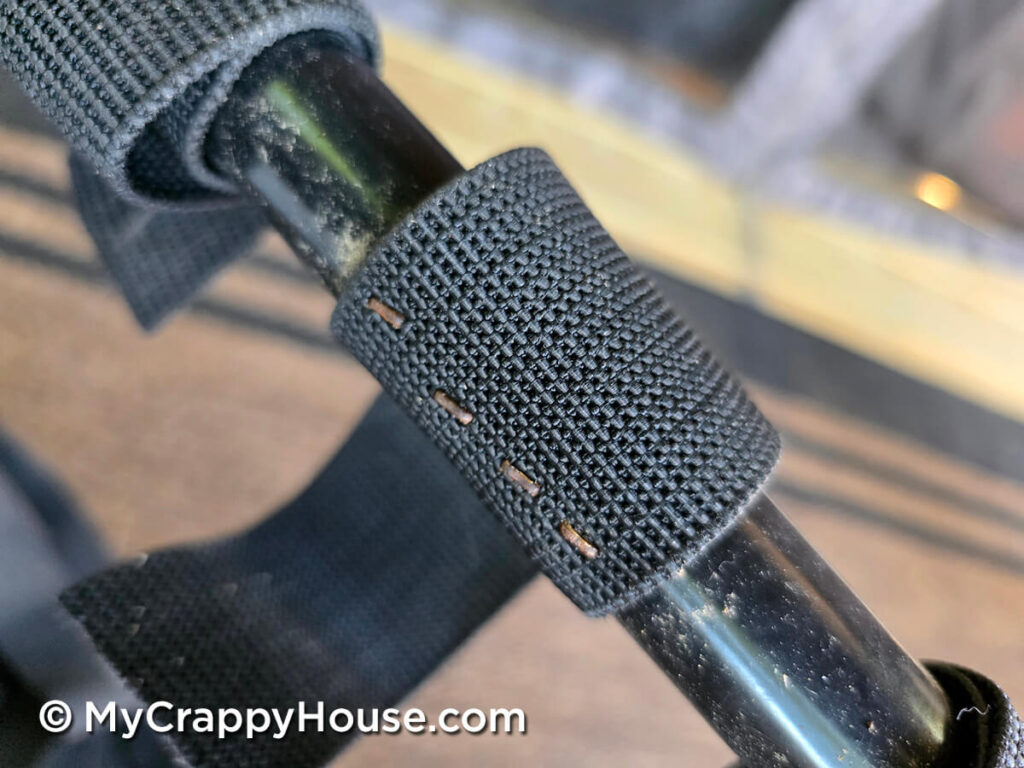
You know, I did consider removing the teeny tiny staples (I even pulled out a few), but it was very labor-intensive. And, really, what harm would leaving them do? I mean, yes, it would absolutely bother me knowing they were there, but out of sight, out of mind, right? Surely the passage of time would fade them from memory…
Right?
So I just left them there. I banged them flat with a hammer.
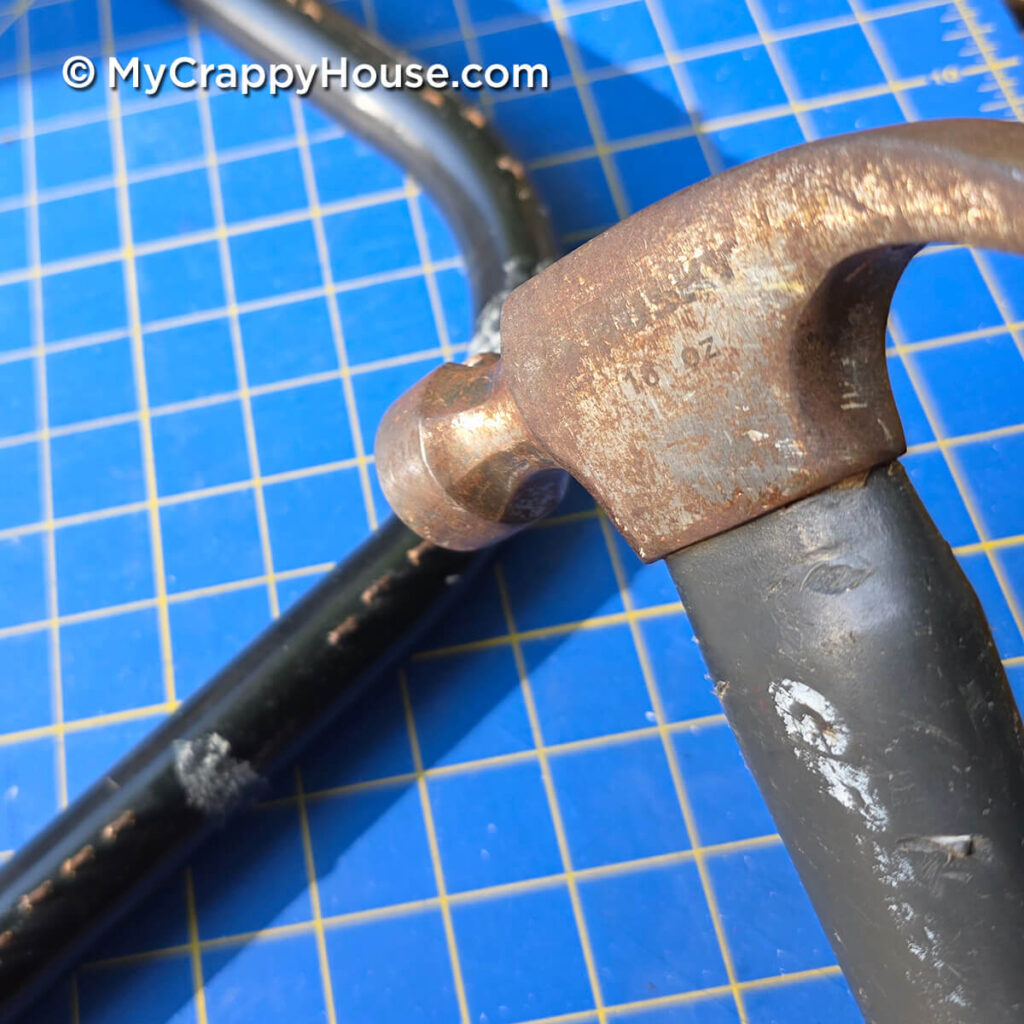
And, after a while, I was able to forget those teeny tiny staples were still there.
After a while…
…
Of course, I just told you what I did, so it’s all come rushing back. The dreams are probably going to start again.
Time to Math (The Boring Part)
Your new webbing is going to attach with the special clips you bought, and these clips need to go into holes. You need to make those holes. But where to put them?
I can’t really give you specifics with this part because I don’t know the size of your frames or what width webbing you chose, but I’ll describe my process and you can use that to figure out your own.
(Psst! If you hate math, you can totally skip this part. Here’s an escape hatch. Save yourself.)
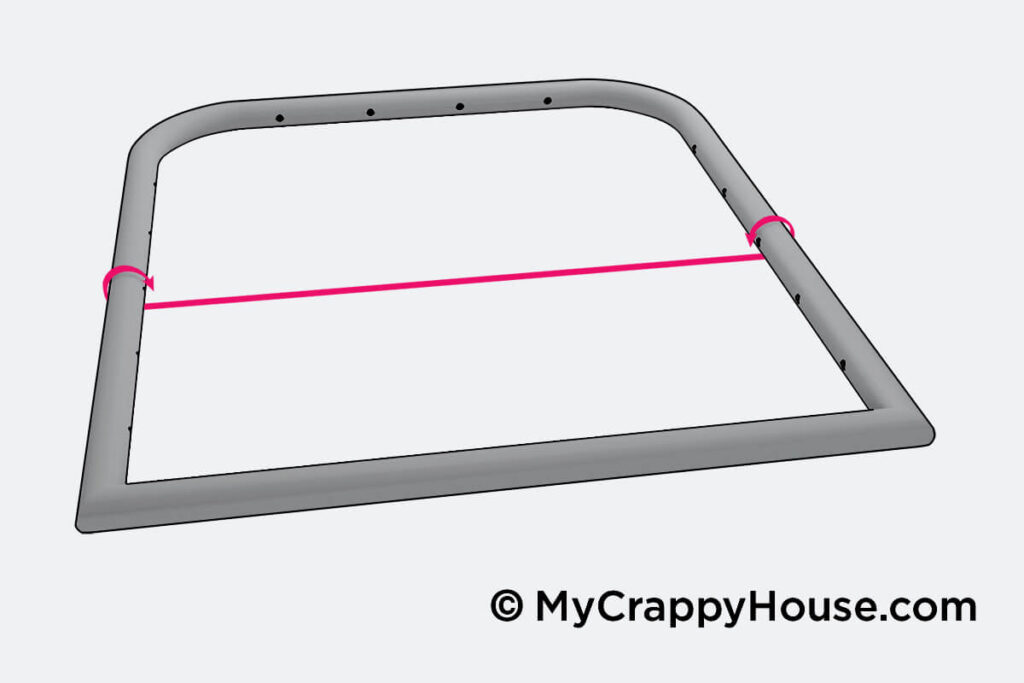
The internal dimensions of each of my frames were about 17″ across and 19″ deep. Rather than explaining wtf I mean by internal dimensions, here’s a graphic:
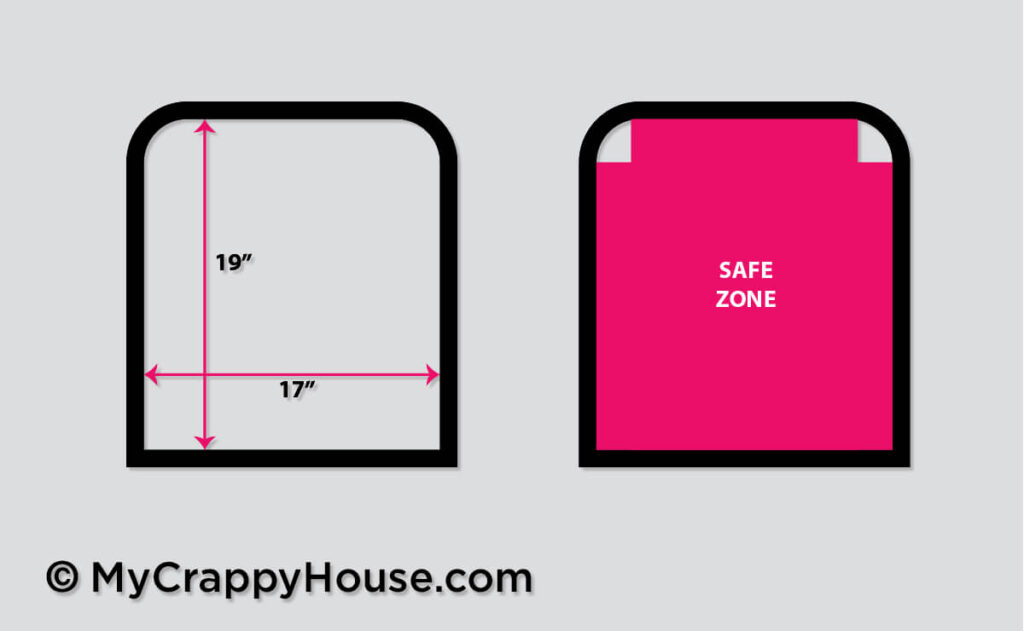
You need to be concerned with curved corners, if you have them. Wrapping webbing around a curved corner isn’t going to work because the strip will slide off the curve, so you need to adjust those internal dimensions to omit any areas that are curved.
Once you subtract the width of any curves to figure out your ‘safe zone’ dimensions (which, for me, were 12.5″ wide by 16.5″ deep), then you can figure out how many strips can comfortably fit in that space. For me, that was four across and five back. My strips were 2.25″ wide and I left 1″ between them.
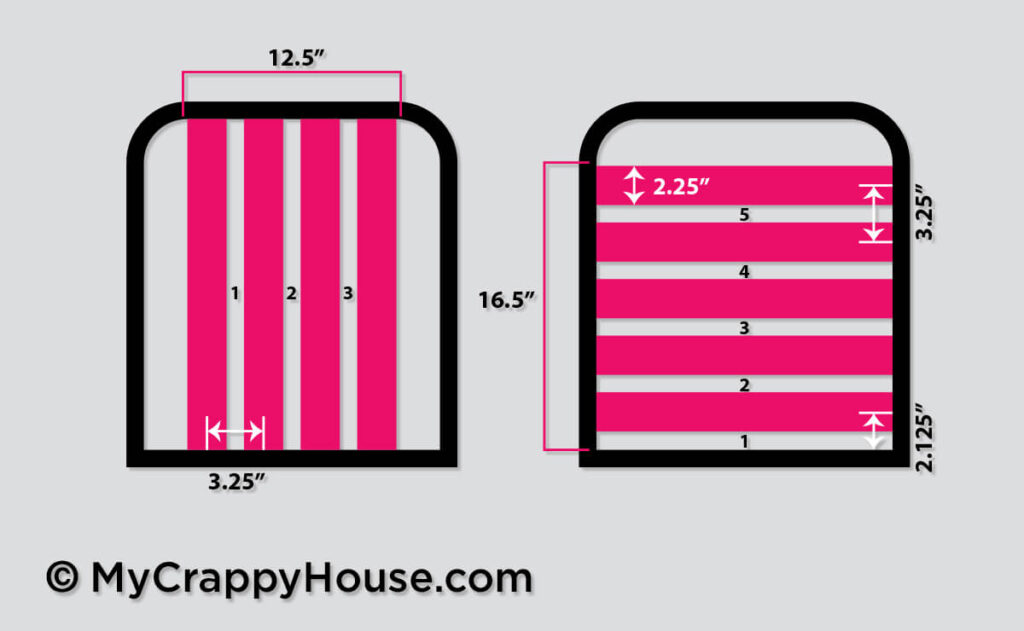
Here’s the math, if you feel like mathing. Let’s do the seat depth (the diagram on the right):
- 5 (strips) x 2.25″ (each strip) = 11.25″
- 16.5″ (of space) – 11.25″ (of strips) = 5.25″ of empty space
- I have five gaps (numbered above), so 5.25″ ÷ 5 = 1.05″
- .05 is barely anything, so I rounded down to 1″
- A 2.25″ strip + a 1″ gap = 3.25″ o/c spacing
- o/c stands for “on center”
- That means the center of one strip to the center of the next strip
- I love bullets
- Hi, mom
Once you have your measurements, put some masking tape around the inside of your frame and mark your hole spots. To be clear, you are marking the ***CENTER*** of each strip. So, from the inside bottom of my frame, I measured 1″ up (my gap) plus 1.125″ (which got me to the center of my strip (2.25″ ÷ 2)) and that was my first hole placement. Then I measured 3.25″ (my o/c spacing) to the next and the next, all the way up the frame.
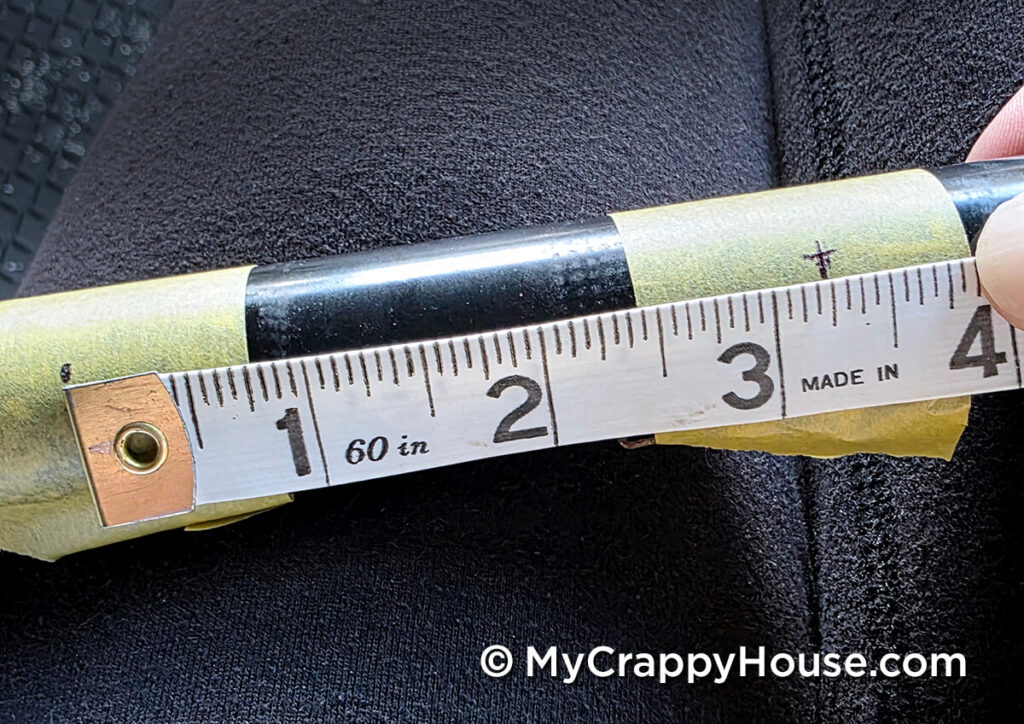
I know that was confusing. Don’t worry. If you hate math (because, seriously, F math), you can totally just eyeball this. Cut some strips out of paper or cardboard and lay them out with your frame. See what works. Avoid the curves. Done.
If you’ve got a cutting mat with a grid, use it. It’ll help you keep your holes aligned.
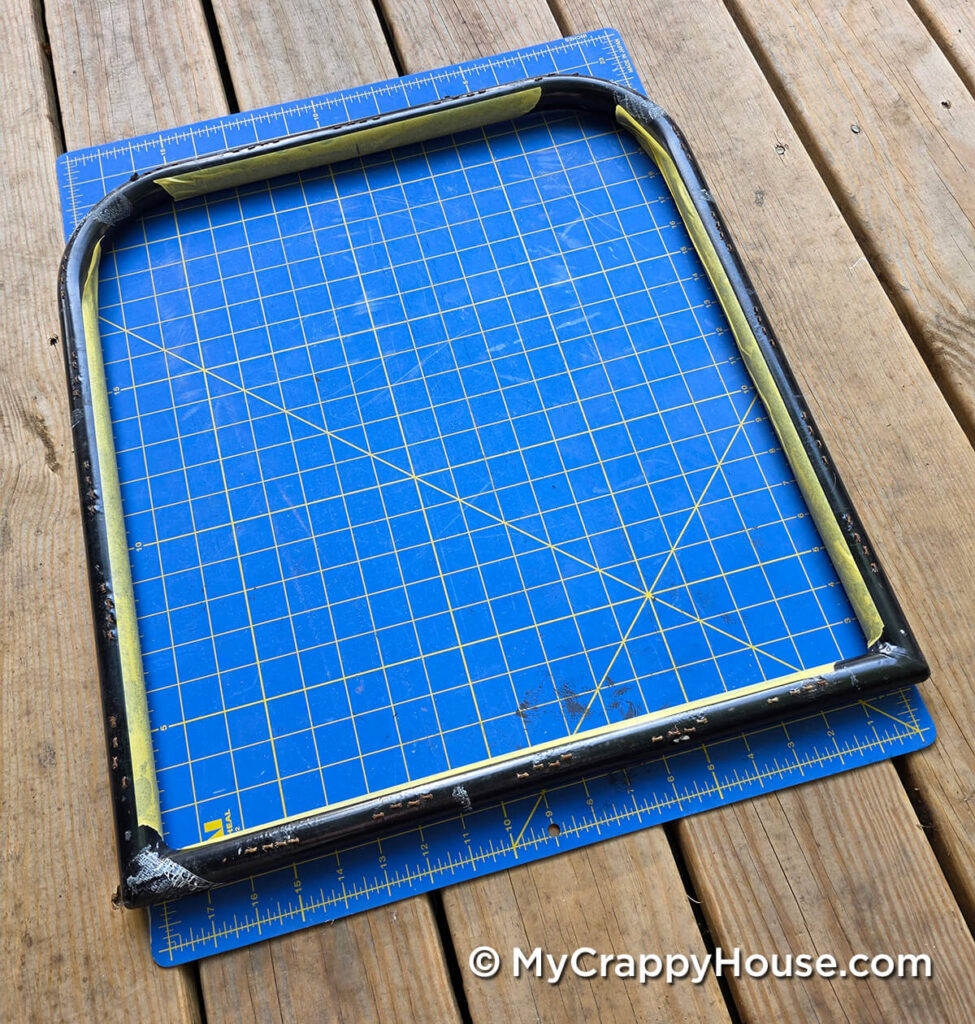
Time to Drill Some Holes
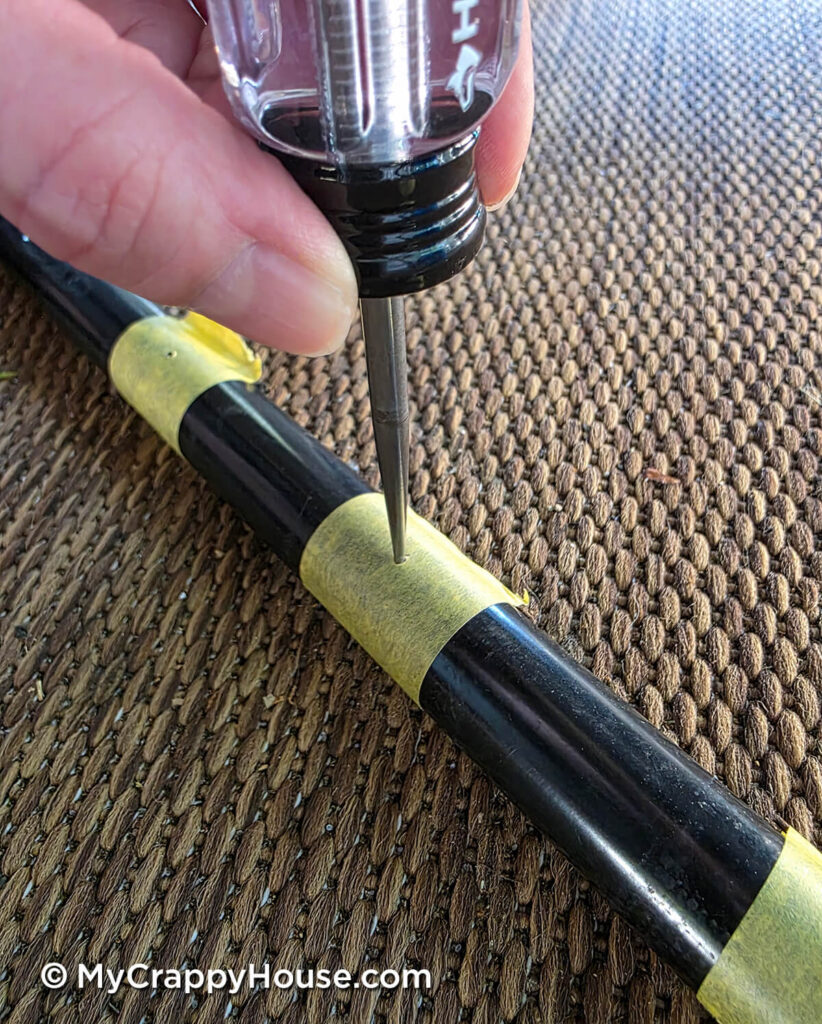
You’ve got your holes marked, but drill bits are slippery little jerks. Rather than make holes in places you’d rather not have holes, do your overworked ER nurses a favor and make starter holes.
Using your hammer and an awl, make a little divot at each hole mark. This will keep your bit from sliding around.
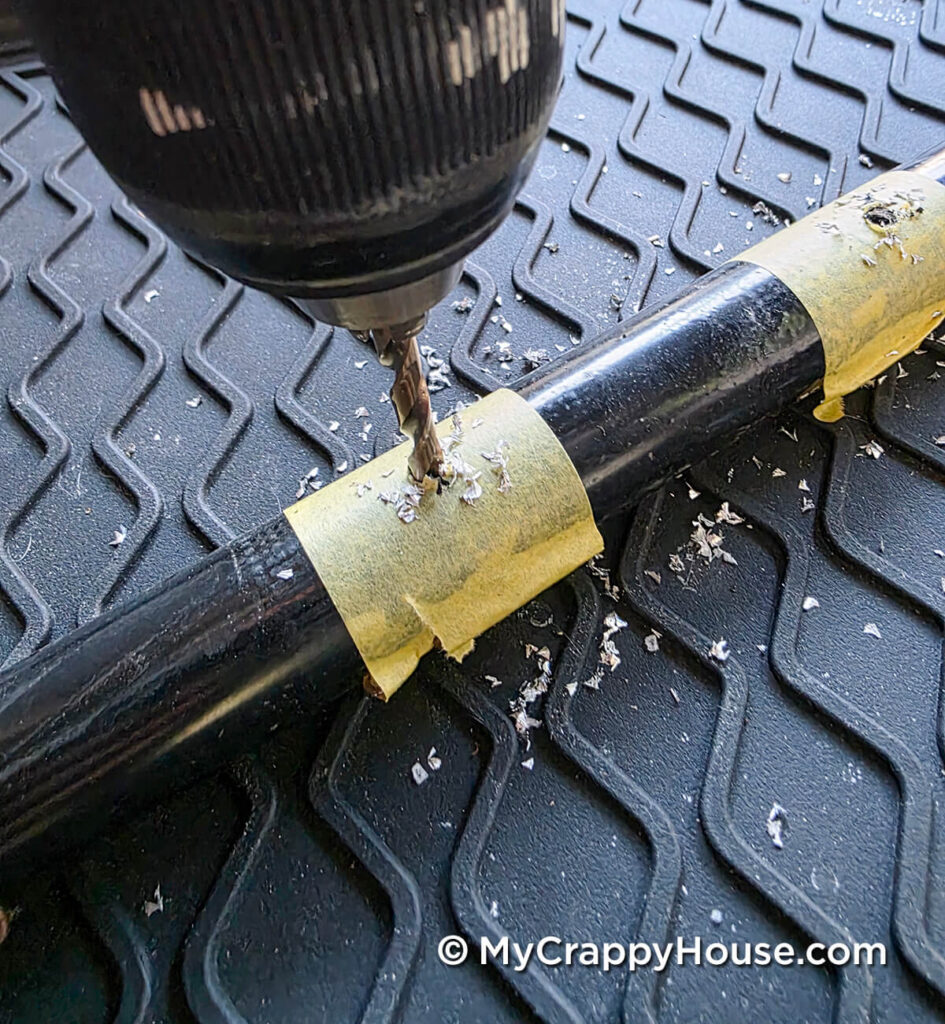
Now, using your 7/32″ drill bit, make some holes. Please be careful. I worry.
Measure Twice, Cut Once
Your webbing strips will go around the outside of the frame on each side, so this is exactly the way you should measure. Using your soft tape measure, place the end at one hole, then wrap it around the frame and pull it across to the other side, again wrapping it around the frame to meet up with its partner hole. They love each other.
Now measure it again, just to be sure.
Once you’re sure, don’t cut anything yet! You need to add four inches to your ‘for sure’ measurement.
Okay, now you can cut.
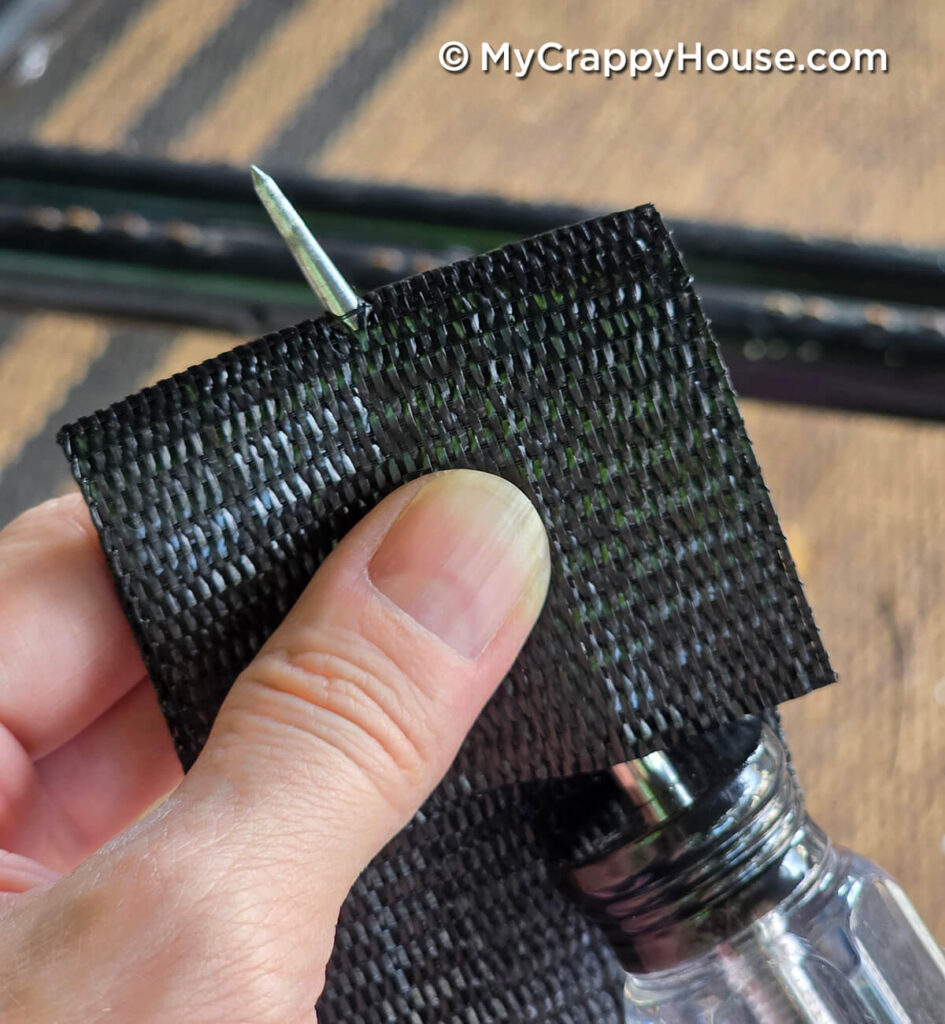
Fold over two inches at one end of your strip and poke a hole with your awl through the center of the fold like so.
Then slip one of the webbing clips through that hole. The long, straight parts of the clip stay under the fold to support it and the curved bit at the clip center should curve towards the uncut side.
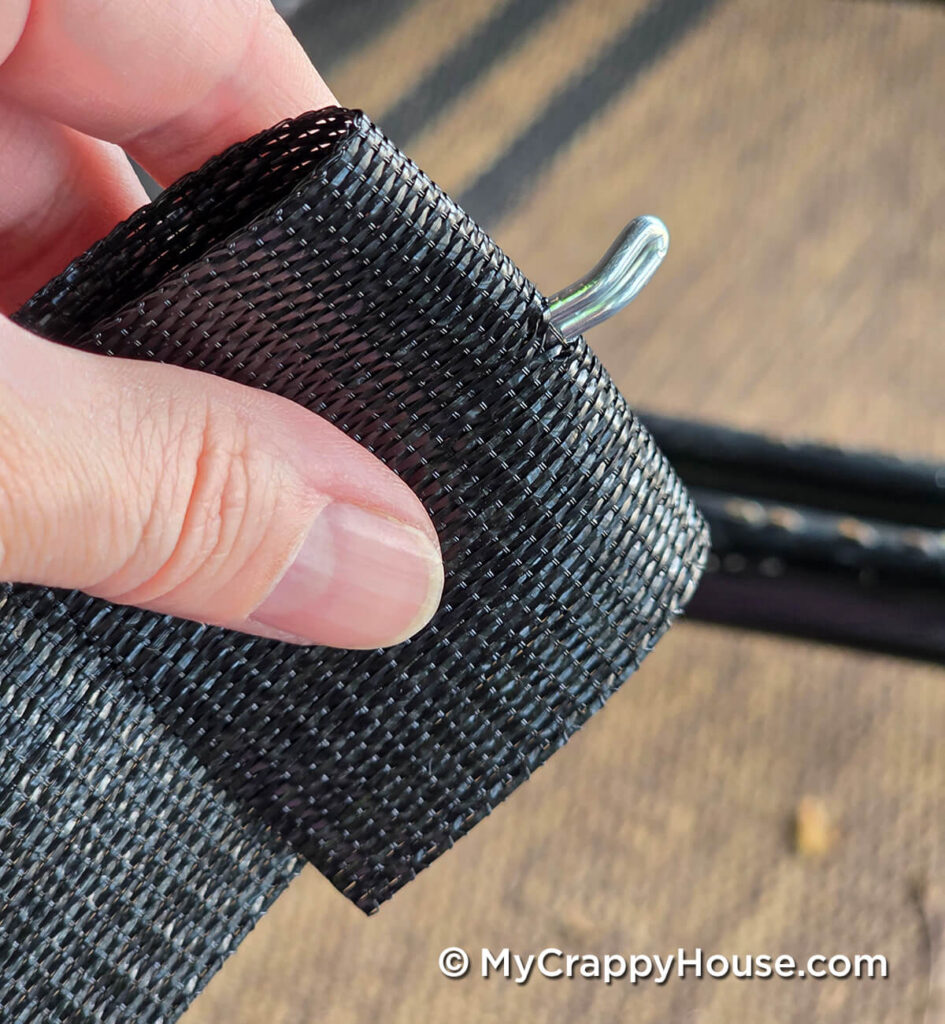
You will be working on the underside of the frame. Insert the clip end into a hole with the curved tip pointing down and the cut end of the webbing facing up. Now wrap the strip up towards you, around, and under the outside of the frame. Pull it across the back side of the frame to meet its partner hole. They’re about to get married. How exciting.
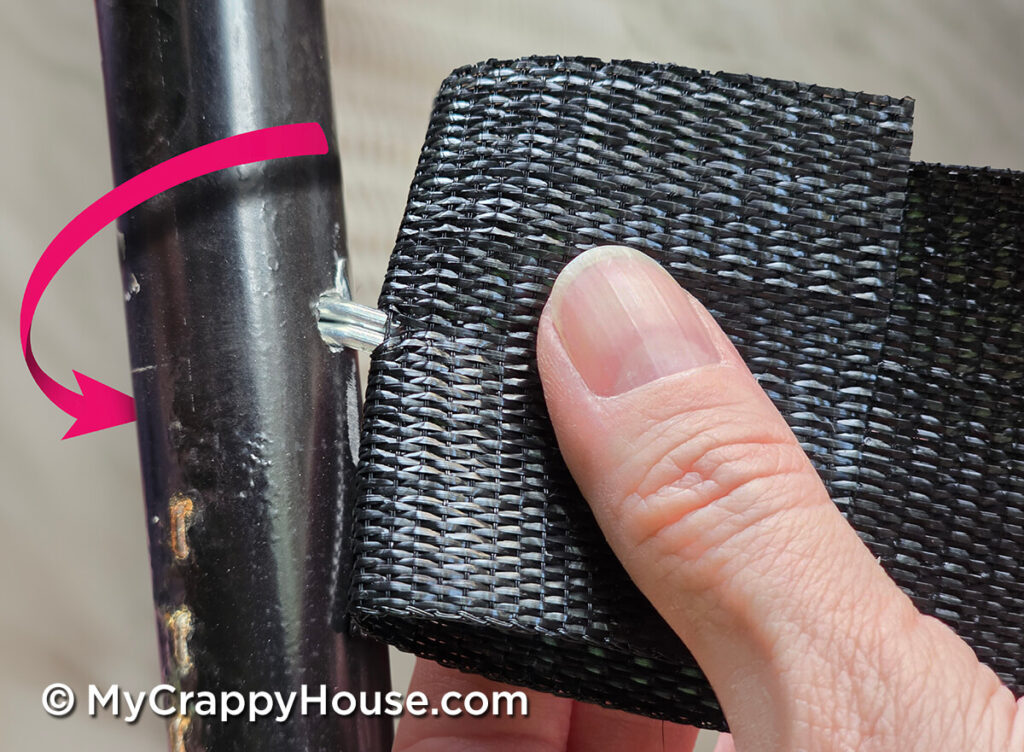
Now you need to get your web strip length just right. Fold over about two inches of the opposite end of the webbing towards you and wrap it around the frame to check the length. You want the fold to be a little shy of the hole so that the webbing will be taut when you insert the clip.
Note: if you can see the cut edge at this point, you’ve done it wrong. The cut edge should be hidden inside the wrap. I’m going to show you a diagram in a bit that will make this clear, so don’t freak out.
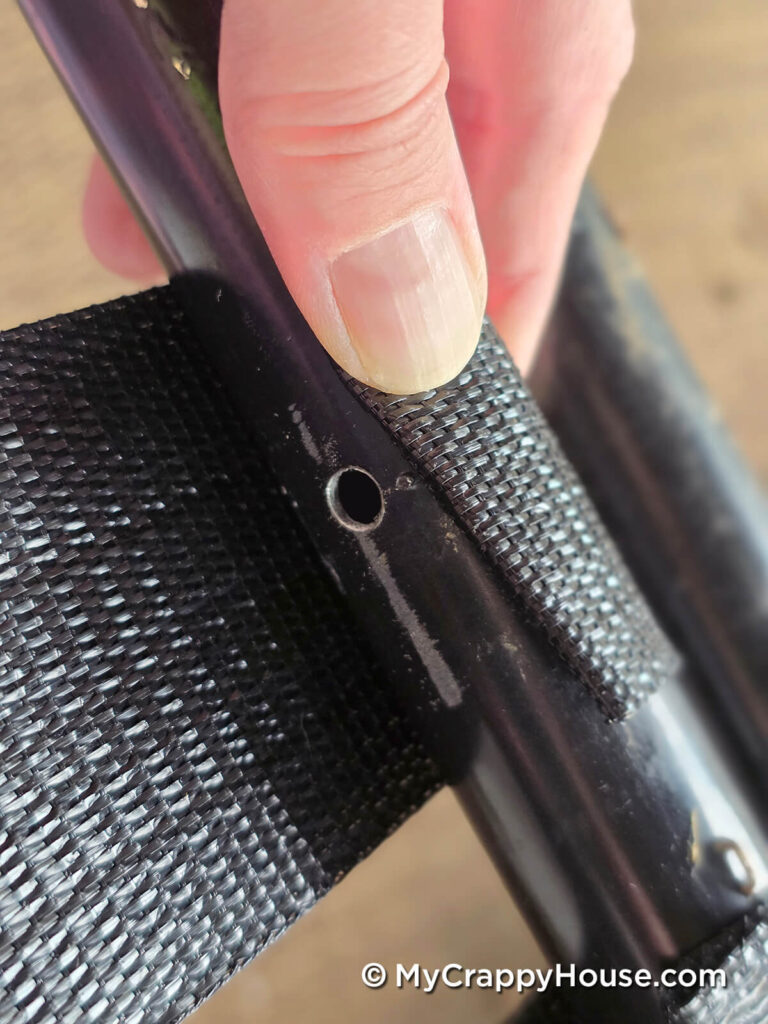
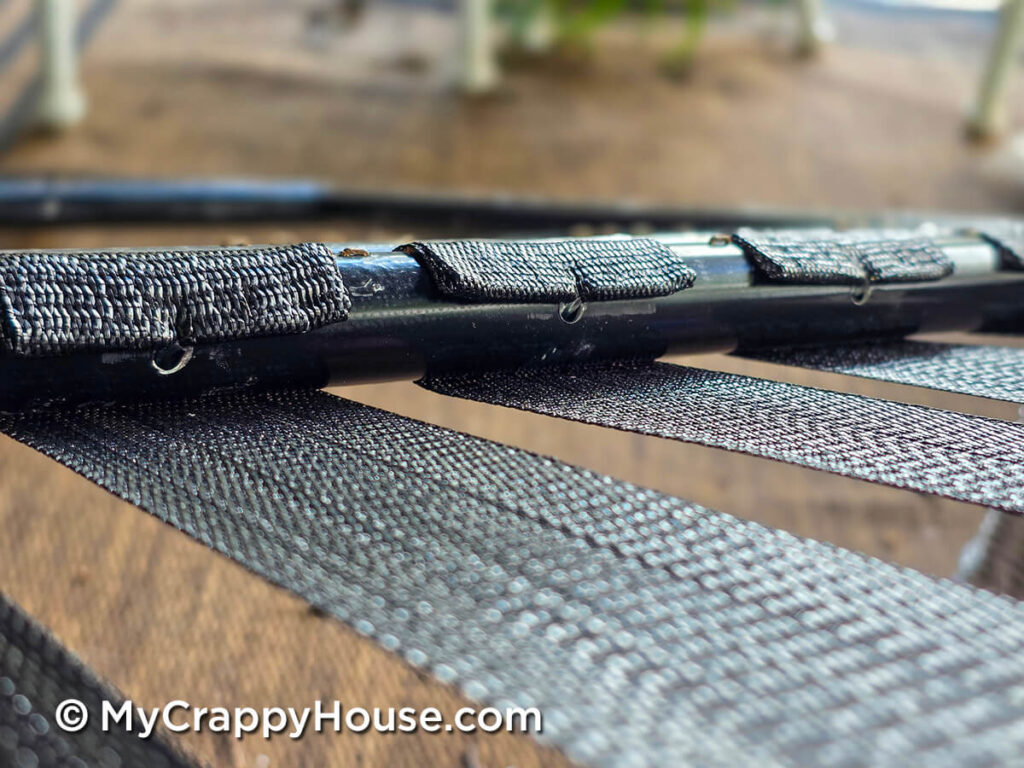
Once you’re happy with your fold placement, use your awl to make a hole in the center of the webbing fold, then poke another clip through, curve pointing toward the uncut side, just like you did before. Lastly, insert the clip into the partner hole.
And now they’re officially married. A holey union! What you hath joined together, let no butt tear asunder.
Now here’s that diagram I promised:
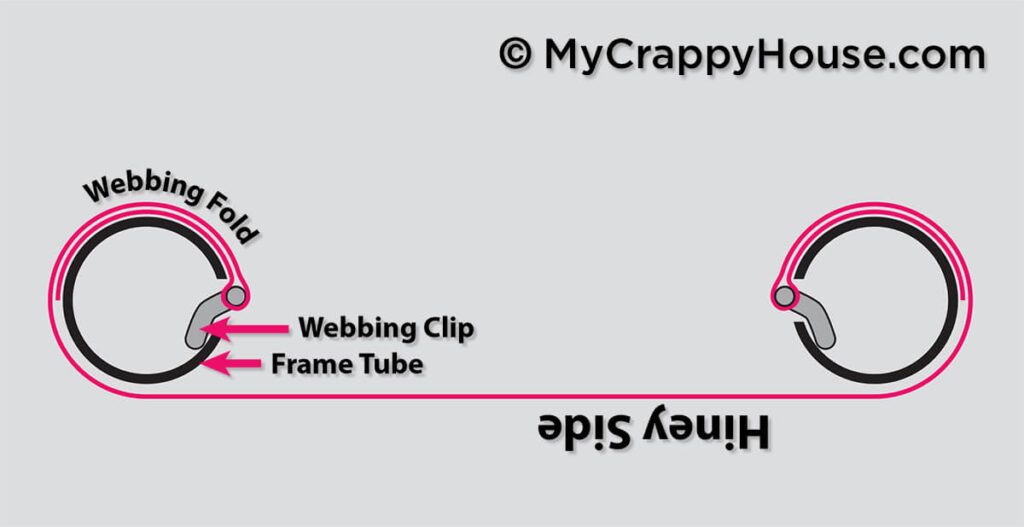
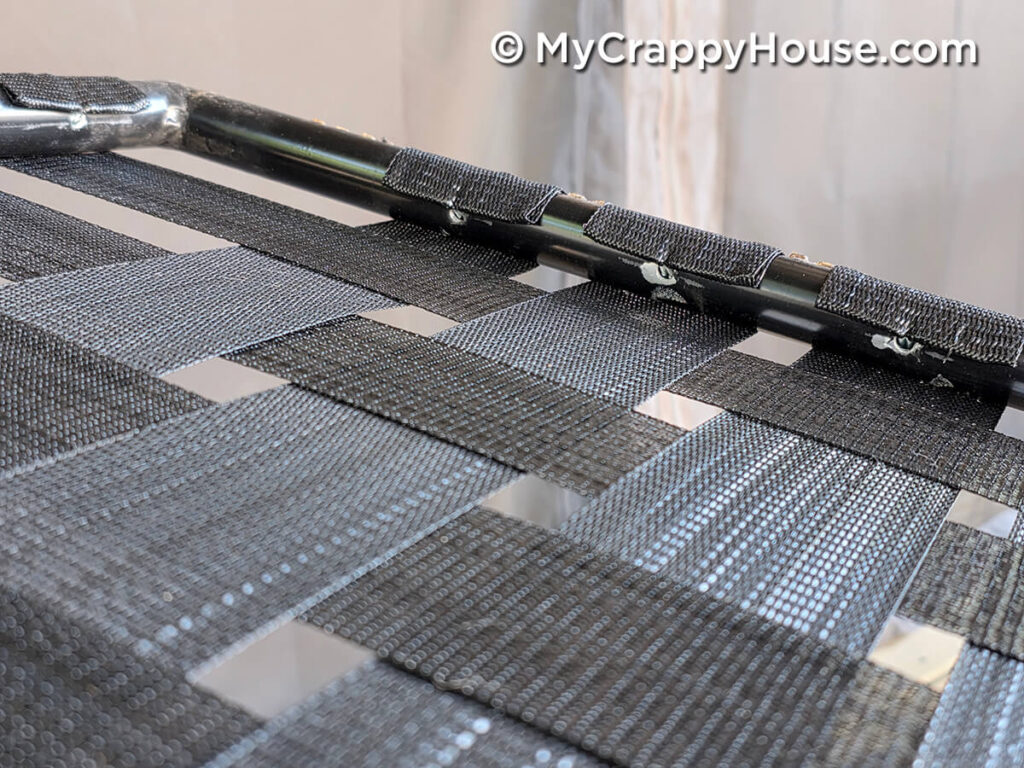
See how the cut end is hidden inside the wrap? And notice how the curved part of the clips sort of hook into the frame. The pressure of a hiney on the webbing only makes the clips tighter. This is why the clip orientation is important.
Now just keep repeating this process until all of your strips are installed in one direction, then begin installing in the other direction. The only difference is you’ll need to weave each strip as you insert it, alternating the overs and the unders as you go, just like that placemat you made out of construction paper in the second grade. (Shout out to Mrs. Graham for teaching me mad weaving skillz.)
Give it Your Awl
The more taut you make your strip, the better your result will be. Unfortunately, the more taut you make your strip, the harder it will be to insert that second clip.
Fortunately for you, your awl can give you the leverage you need. Poke your awl through your strip, just above the clip bar, and rest it onto the curved tip of the clip, poised over the hole.
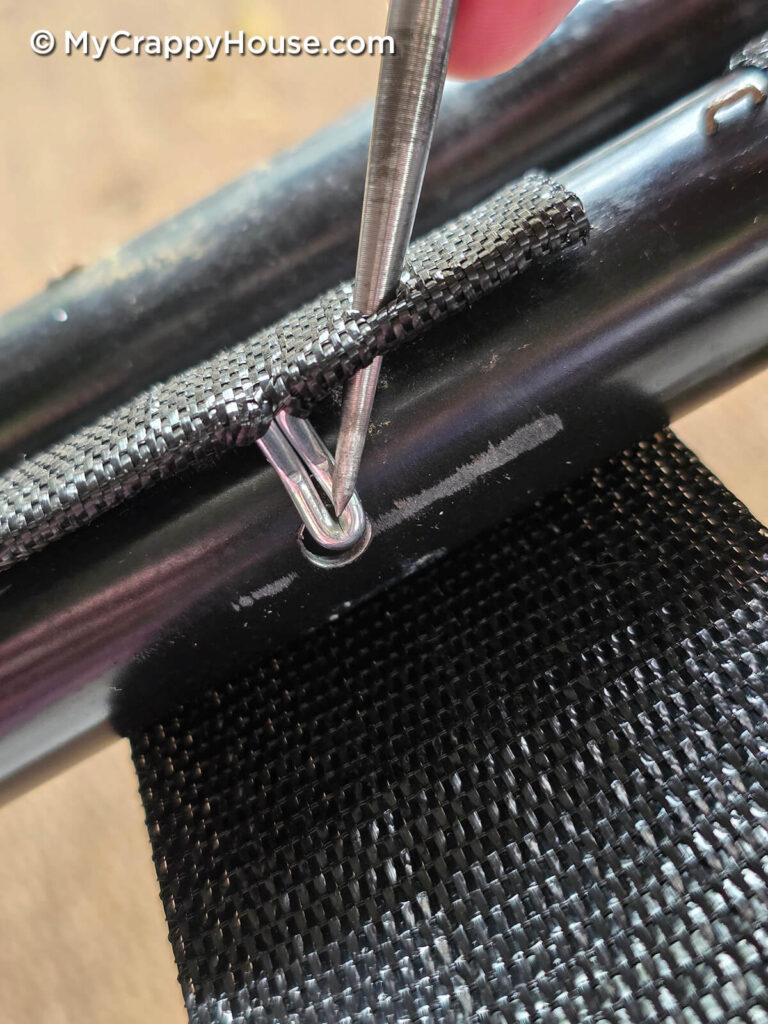
Now, while guiding the clip with one hand, use the awl to pivot it into the hole with the other.
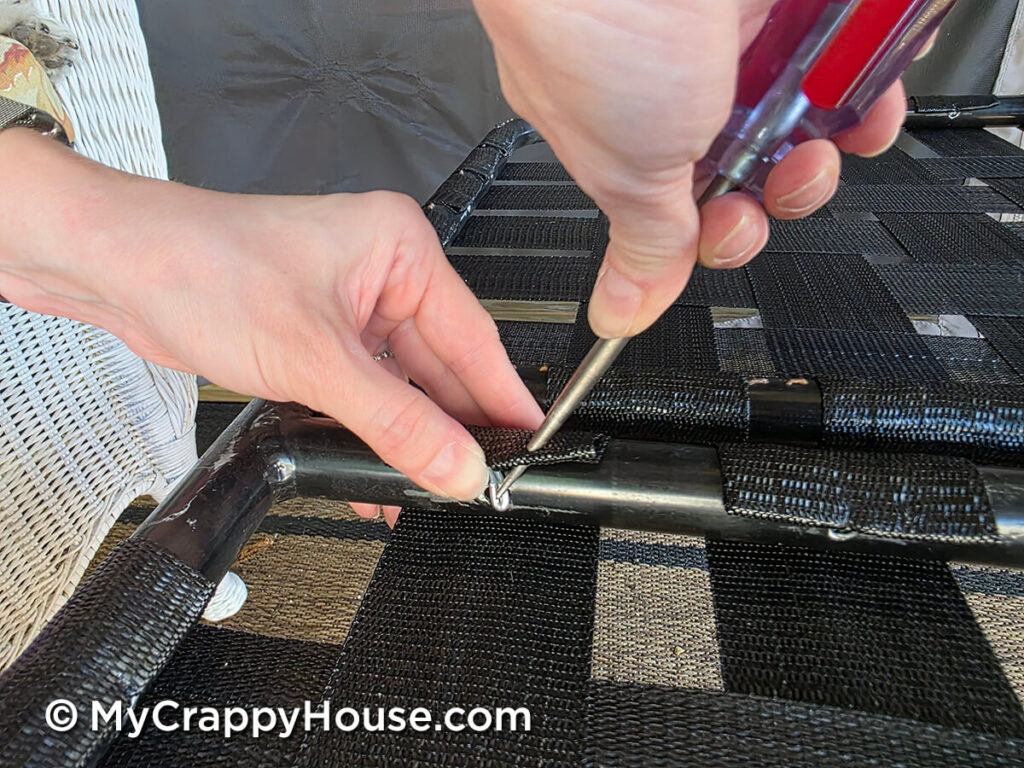
Easy peasy!
Actually no, not easy peasy. This part totally sucks, but I know you can do it. I know you are capable of great things. You just have to believe…
Revelations
There is evil in this world.
But all is not lost.
Many will stand by and do nothing.
A select few will answer the call.
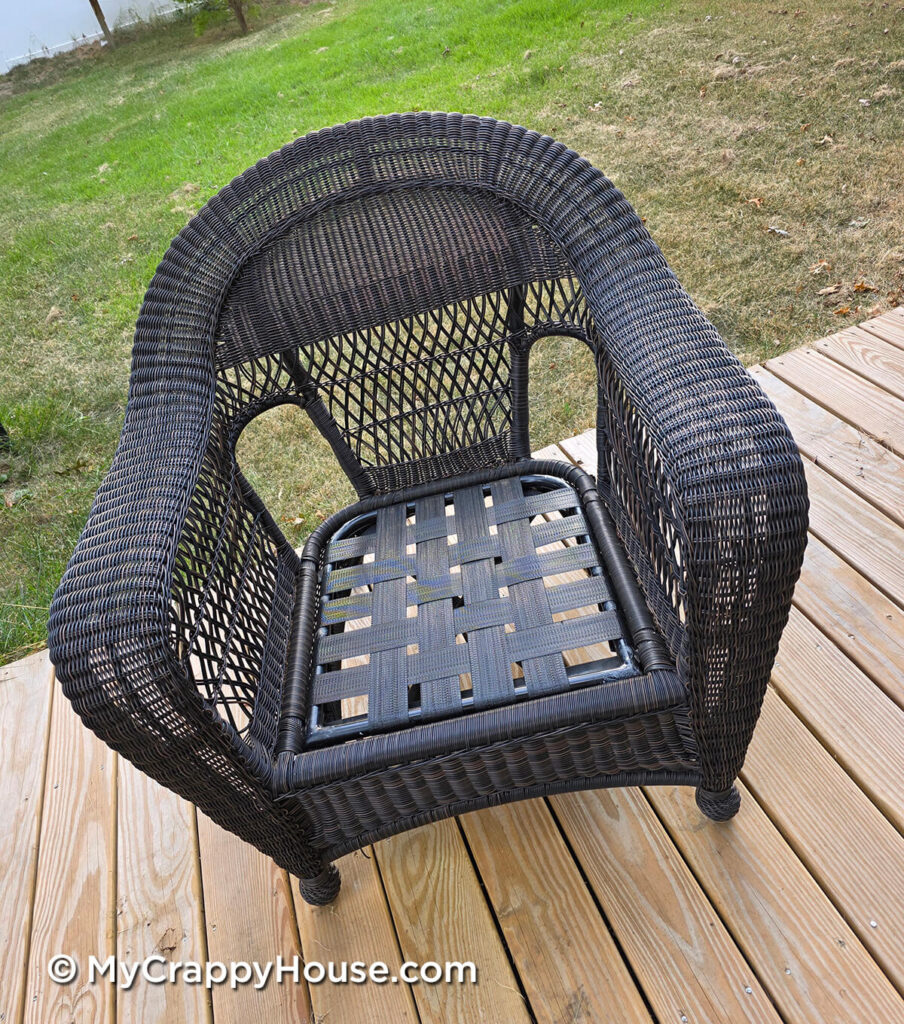
They don’t do it for the glory. They do it for justice.
(And maybe they do it to save a little money…)
No one is likely to compliment your amazing web skills. Your flawless work will probably go unnoticed, hidden away beneath foam and fabric. But when your guests sit down and don’t hit the ground, you will know, deep in your heart, that you saved them.
With your webs.
Just like Spider-Man.
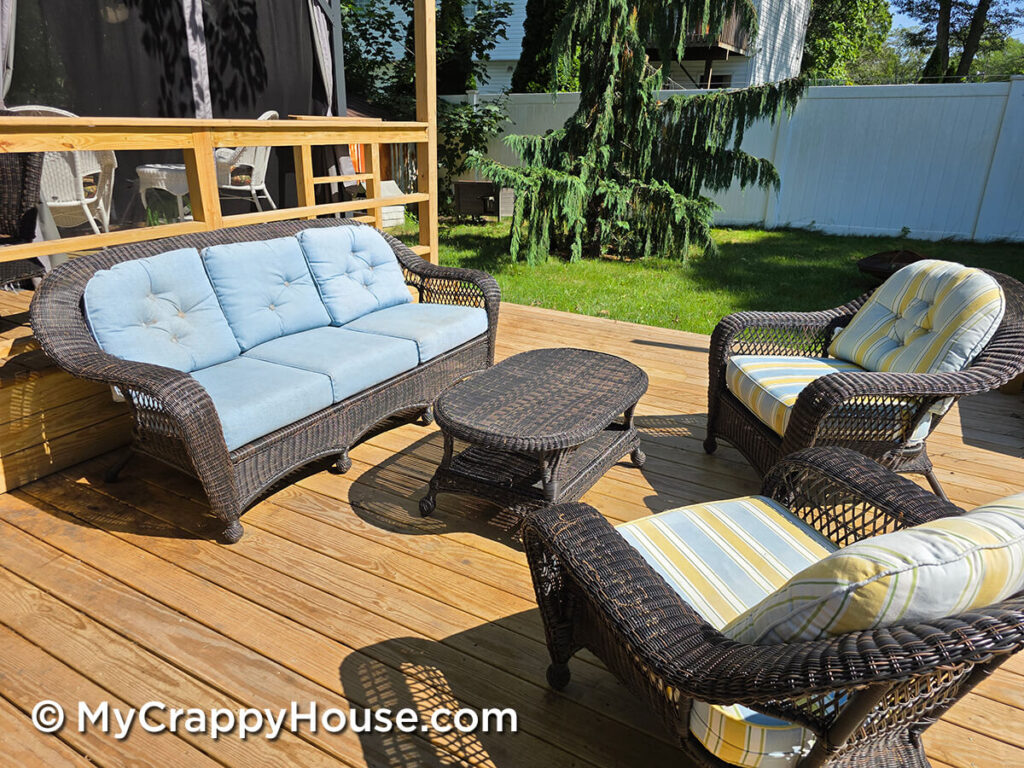
But that’s some nasty-looking foam and fabric, y’all. My outdoor furniture now has the power to literally save your ass, but would you really want to sit on it looking like this?
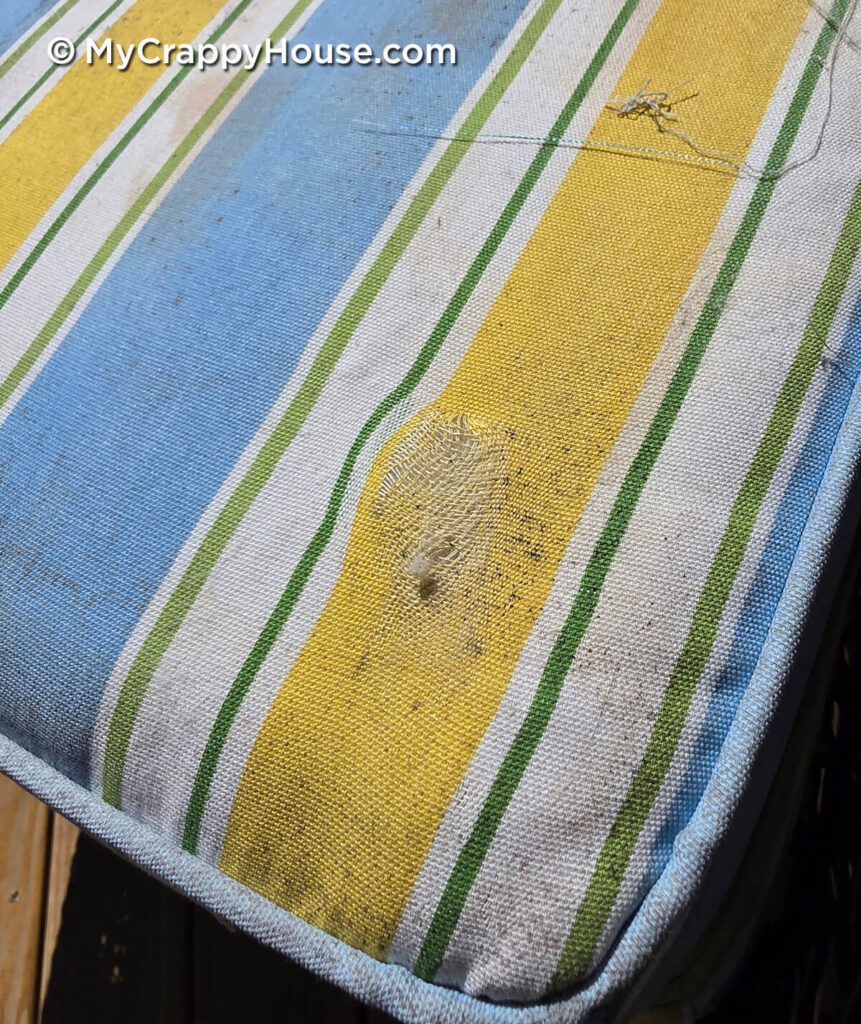
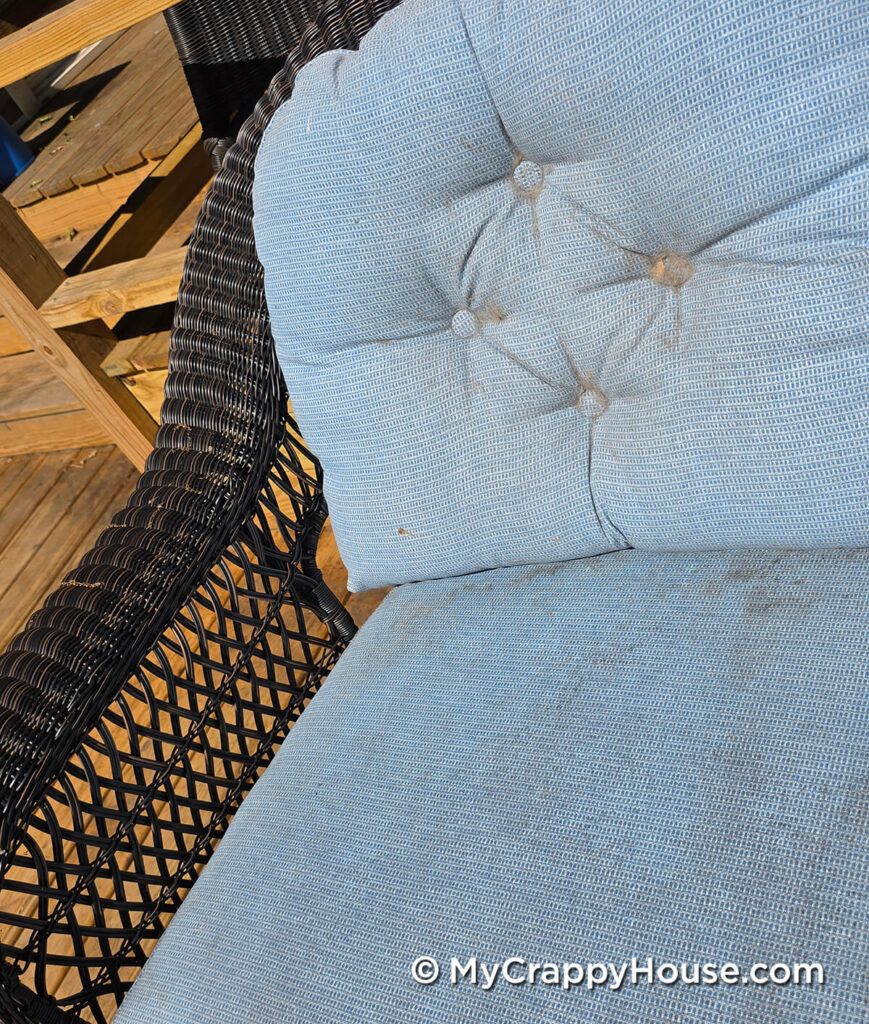
No, thanks. I’ll stand.
Those cushions need new covers. (Well, need-ed, because of course I sewed fabulous new ones two years ago…) I’ll tell you all about it in my next post.
Whenever that is.
*This post contains affiliate links

22 Comments
Louise
You know I go straight to read whenever I get notice that you posted, right? 😆 Reader since your blog first started–always love reading your DIY projects! And that webbing turned out amazing! Well done! 🙌🏽
My Crappy House
Thank you so much for following all these years! That makes me so happy
Mona's Papa
My hiney appreciates this post.
My Crappy House
This post appreciates your hiney.
Sheila Jocelyn
Your photos and graphics are gold! The finished webbing is beautiful on its own; I would sit on that gladly, I think Come back soon, please. You’ve been missed. Also toss us an IG here and there. Lordy I’ve become demanding…
My Crappy House
Thank you for missing me! I’m terrible at IG, I know. It’s just that the lazy runs so deep… I promise I will try harder.
Katherine Davies
Longtime reader here, too. You always make me laugh. That was a great tutorial! And a great bargain on that gorgeous furniture.
My Crappy House
Thank you! And I know, right? We really lucked out! I didn’t put it in the post, but when we went to pick up the furniture, he also had a matching dining table and four chairs with a glass top that he threw in for TWENTY FIVE DOLLARS! It was an amazing score that day! You never know what you will find on those second hand boards…
Cindy Eschenroeder
Happy birthday!! I get so excited when I see you’ve written! Can’t wait to see the slipcovers in your next post.
My Crappy House
Thank you so much! I made it another year I’m excited to show you all my slipcovers. They came out perfect. (She says humbly…) (But not really because they totally did come out perfect…)
Helen Wharton
Happy Birthday! 🎂🎉 Hope there’s cake!
Always get excited to see a new post from you. Great job on the chairs. Your upholstery instructions were outstanding, but I would still be too confused to try it myself. Guess people like me are always going to keep falling through holes in chair seats. Or pay thousands for new chairs.
Especially interested in seeing your seat covers post; need to make waterproof versions because I wrecked mine leaving them out in the rain too often and they became smelly.
Also loved the kitty falling asleep in their food dish.
Thanks for another awesome post!! 🙋♀️
My Crappy House
Thank you! I’m sorry for the delayed reply. (I did start this post out by proclaiming my laziness though, so I’m sure you’re not surprised.) Yes, there was cake. Too much cake!
I hate that my new cushions get wet. I thought about getting furniture covers to put on when we’re not using it, but who am I kidding? Am I really going to put covers on every time I’m done sitting? No. I’m sure I’m not. I think I will put a poll in my next post asking people what they do with their outdoor soft seating to keep it nice. I’m new at having an adult back yard. I have no idea how to maintain it.
Joan
LOVE seeing a new post! I would have read it sooner, but the computer was in the shop and I just got it back today. Looks good and now I’m looking forward to seeing the new cushion covers post!
My Crappy House
Thank you! I would have replied sooner, but I’m just super lazy and that’s all. I’m hoping to have the covers post before the end of the year. Wish me luck!
Janel - Brand Junkin’ New
Save the lawn furniture! ❤️ Thanks for an entertaining learning sesh. Love the topic and your humor and diagrams/photos are next level! ⭐️
My Crappy House
Save the lawn furniture! (I heard that in my head as “save the clock tower”!) Thank you for your permission to use the lawn chair photos! They were perfect.
Mom
Well Spider Girl you always amaze me. I would love to take credit but it’s beyond me. But you do carry my genes so I’m in there somewhere. PS, I would not be surprised if down the road you take it all apart to remove the staples. Your mind is a terrible thing and should be stopped before it hurts someone. LOL.
My Crappy House
You’re not wrong. My mind is dangerous, but mostly to me. I don’t know how I live with myself.
Henry
Replacing the webbing instead of throwing the chairs away is such a good save, and your writing made the process genuinely fun to read. How tight did you pull the new webbing? Does it relax over the first few weeks in the sun, or stay where you set it?
My Crappy House
Thank you! I was able to pull the strips pretty tight using the awl for leverage. The webbing has already been through two summers and one winter and it has not relaxed at all. Most of that time was without cushions so it was fully exposed to the elements.
Tamster
Great post- could fit under DIY or comedy because I spit out my chowder a few times laughing. I’m amazed at how much work and math this took- and I hate math. But I’m once again impressed by your humor and skill. I kind of want to be invited to a BBQ so I can sit my hiney on it. Maybe even do a little trampoline jump.
My Crappy House
OMG I hate math too! But I had to do it. For the nerdy people. If I ever get around to buying a BBQ, I will definitely invite you and your hiney over.