

My Chandelier Makeover
I love chandeliers. They’re ridiculously trendy now, but about 5 years ago, when I needed a black one for my bedroom, the only reasonably priced ones I could find were from stores in the UK. (That happens to me all the time. Damn you, England, and your cute shops with awesome stuff that won’t ship to me.) The cheapest one I could find in the US was like $300. It wasn’t in the budget. So I started trying to come up with alternatives. I found a plain, old, brass chandelier frame on E-Bay with the wiring intact for like $20. I bought it.
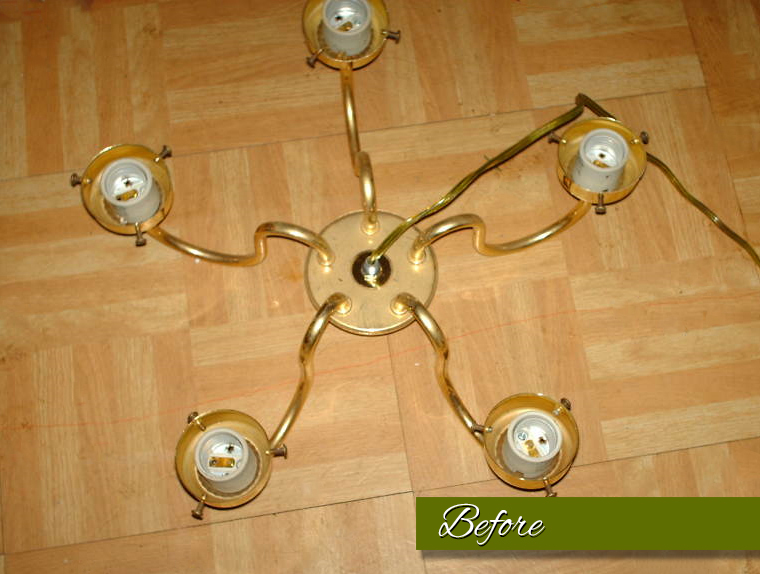
These are the E-Bay seller’s pics. That’s not my man hand…

So the bones weren’t too bad, but I had some modifications to make. This chandelier was meant to hold regular standard sized bulbs with glass shades. I bought replacement candelabra sized sockets and replaced them. Also, the shade holders had to go. Chandeliers have a cup at the bottom of each bulb stem. You can call it a drip pan, but if you want to sound pretentious (and I do), it’s called a bobeche. I ordered those from my local lighting supply store and drilled some holes around the perimeter of each one. For the center column, I went to Home Goods and bought a couple of interesting candlesticks and drilled holes down the center of each. I attached a threaded rod to the bolt at the base of my chandelier frame (you can see the bolt in the picture) and slipped the candlesticks over the rod. I added another bobeche and held everything together at the top with a special nut with a ring attached for hanging. With the exception of the bobeches (bobechi?), all of this stuff can be found at Home Depot. Here’s a nice diagram that shows all of the parts in case you were thinking of trying this yourself.

Once I had all of my parts assembled, it was time to paint it. I used a spray primer called BIN. It sticks to anything – even polished brass. I primed it, painted it gloss black, and then it was time to add the bling. I went to a store called Claire’s that sells cheap costume jewelry and I picked out a bunch of black beaded necklaces, then went to work with my needle nose pliers. When all was said and done, I spent less than $100 to make this chandelier.
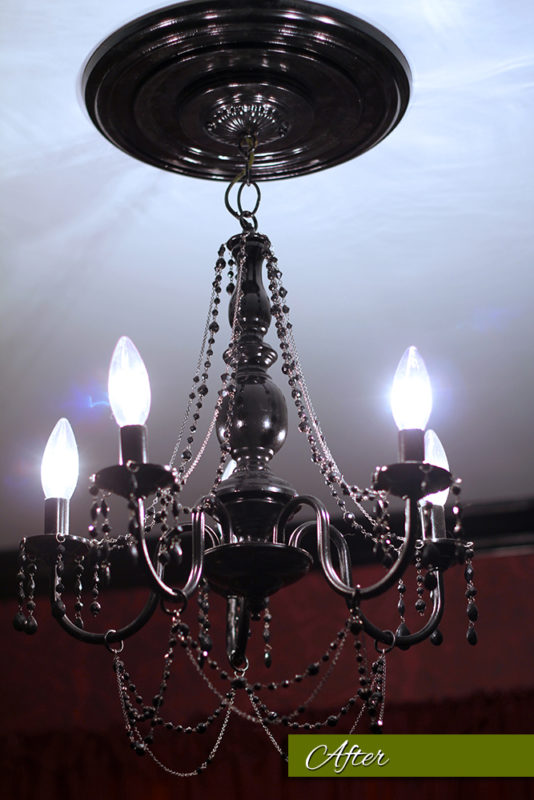
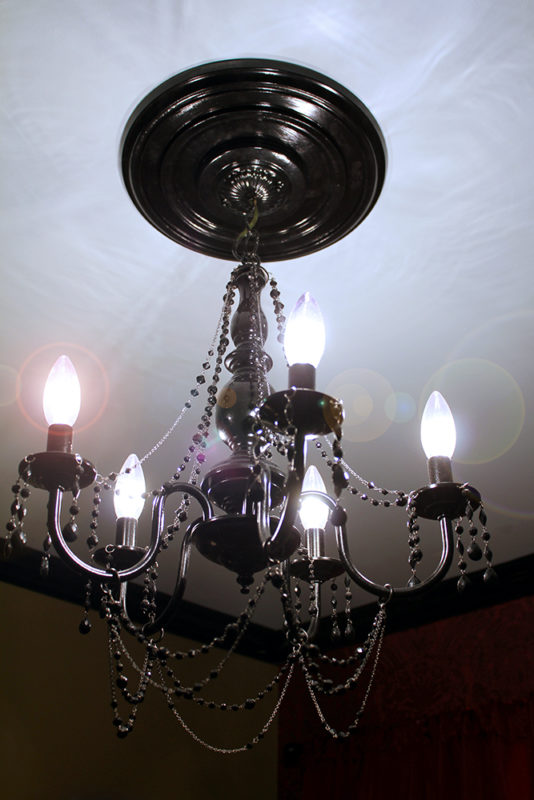
What do you think? It used to hang in my bedroom, but then I bought my crappy house and now it hangs in my dressing room. That’s right. I have a dressing room! I can’t wait to show you that project. Soon…


6 Comments
Franny
It’s fantastic. I wish I had a crappy house for your magic
My Crappy House
Thank you
Missy
I wish I had about 5% of your style and eye for decorating…I am so bad at it!
My Crappy House
Not true! Your home is very inviting
Christy
Love the chandelier! I did one just like it for my (then) 9 year old daughter’s bedroom. It was gorgeous but she said it looked like a giant spider and she couldn’t sleep with a giant spider hanging over her head. So it ended up in my dining room…and I love it!
Found you on Apartment Therapy…Love your blog…excited to watch your crappy house become super fab!!!
My Crappy House
lol I can totally see the spider similarities! That’s a creative kid you have there. Thank you for coming by. I’m kind of new at the whole blog thing, but I’m having loads of fun and I have SOOOO much more to share. I hope you do come back