Brick Love, Part II
All in all, it’s just another brick in the wall. And another. And another. And… Yeah. Lots more of that.
I wrote Brick Love, Part I so long ago that you probably don’t even care about Brick Love, Part II, but could you please just try to care anyway? Because the brick wall that I installed all by myself came out awesome and I’m very excited to show it to you. And there’s an excellent reason why it took so long…
It’s like this. There are three major components that determine how long any particular project will take me to complete. There’s the difficulty level. (Self explanatory.) Then there’s the scope of knowledge. (Have I ever done this before? Can I learn this on YouTube?) And lastly, there is the lazy factor. (I am lazy sloth girl.) For this particular project, each of these components were at their maximum levels. In other words, installing a brick wall is freaking hard when you have no idea what the hell you’re doing and you’d rather be curled up on the couch with your fleecy blanket watching The Walking Dead. In other other words, it took me months to finish this project.

Before I could do anything, I had to build a platform over those stairs. I am emphatically anti-paralysis. Definitely pro-mobility. Walking is the bomb.
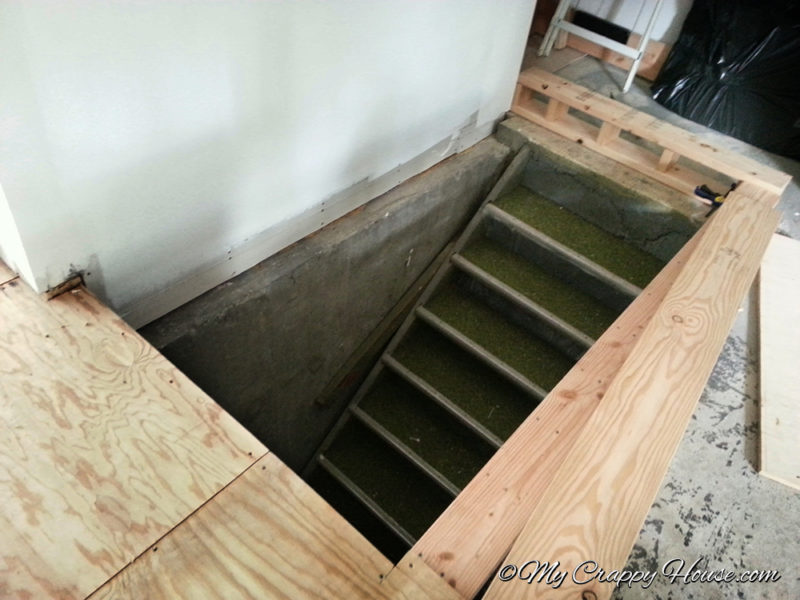
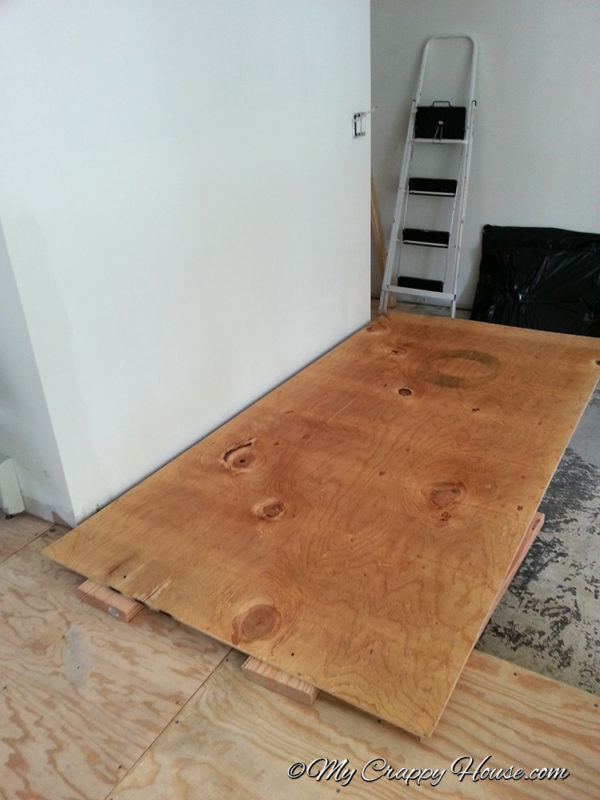
This was such a daunting project, it was easy to procrastinate. This bucket was ready to go way before I was. It also implied that there was a “we” doing the job. It really should have said, “Go, You.” “You’ve Got This.” “Kick Some Ass, Girl.” Something like that.

There are a bunch of YouTube videos demonstrating how to install brick on a regular wall in your house. I am here to tell you they are all wrong. They would have you glue bricks directly to your drywall. Drywall (aka Sheetrock) is basically plaster sandwiched between two sheets of paper. PAPER! What do you think could happen if you glue a half ton of brick to your paper wall? Nothing good, people.
I went over my drywall with this:
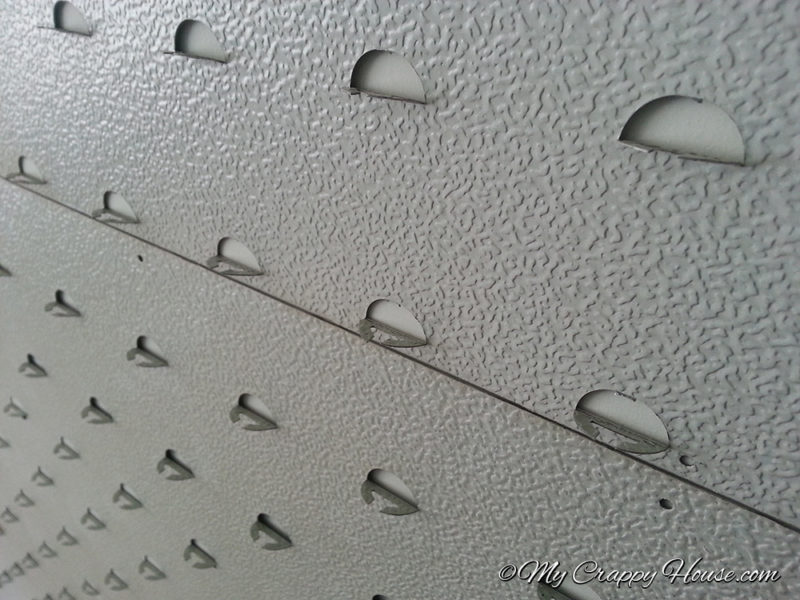
That’s special sheet metal made just for this purpose. See those little tabs? They hold up the bricks and keep the rows even as you glue them in place.
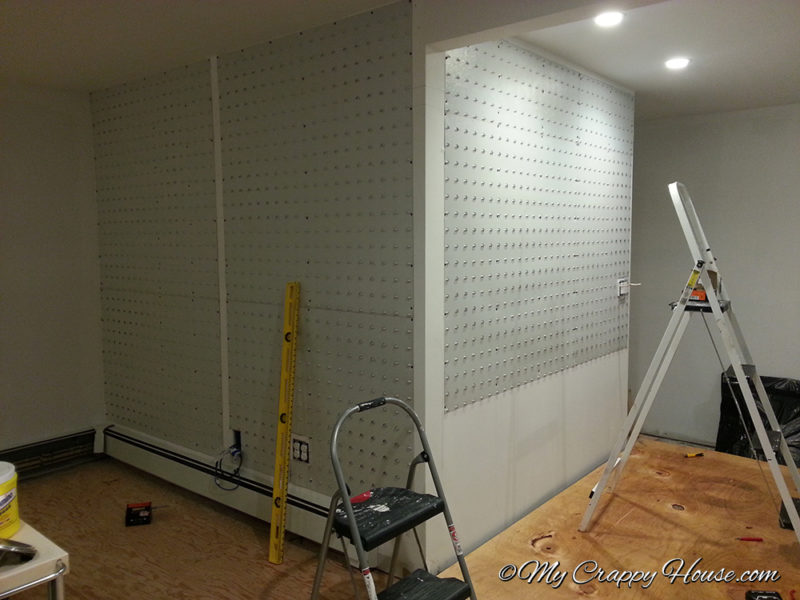
The sheets get screwed right into the studs. (So I won’t get screwed by paper peeling off my drywall…) They are very sharp and very heavy. Installation sucked a lot.
The next step was gluing the bricks. I started on the corner so any cuts I had to make would end up on the outside edges.

And then I kept on going…
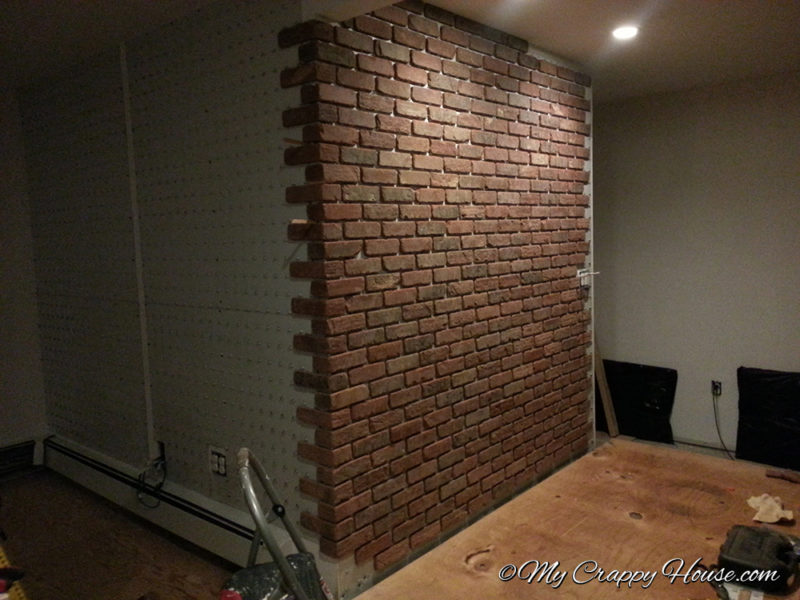
That part took a couple of months. I glued each brick on with construction adhesive. I used a tile saw to make cuts. Bricks are heavy. Installation sucked a lot.
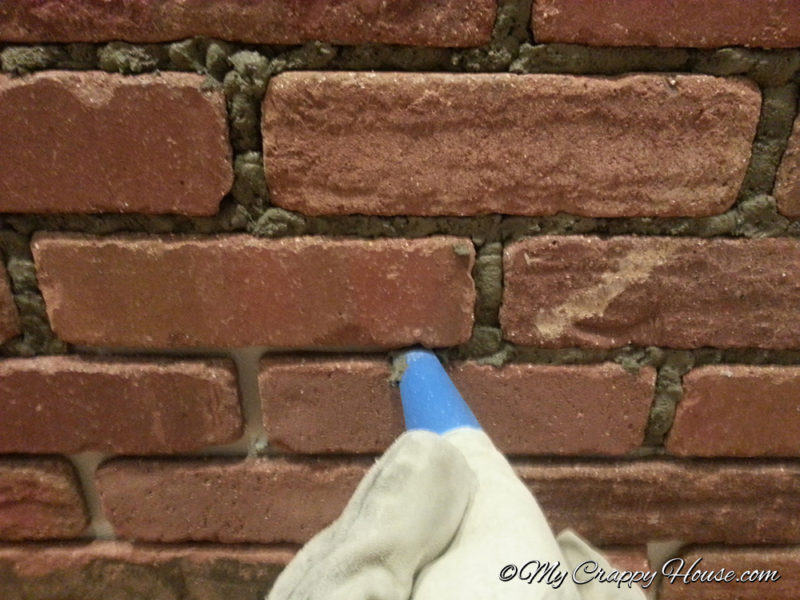
The next step was mortaring. Squeezing mortar through what’s basically a pastry bag for concrete was difficult with my weak, girly, bird hands. Also, concrete is heavy. And installation sucked a lot.
Here’s a picture taken after my first day of mortaring.
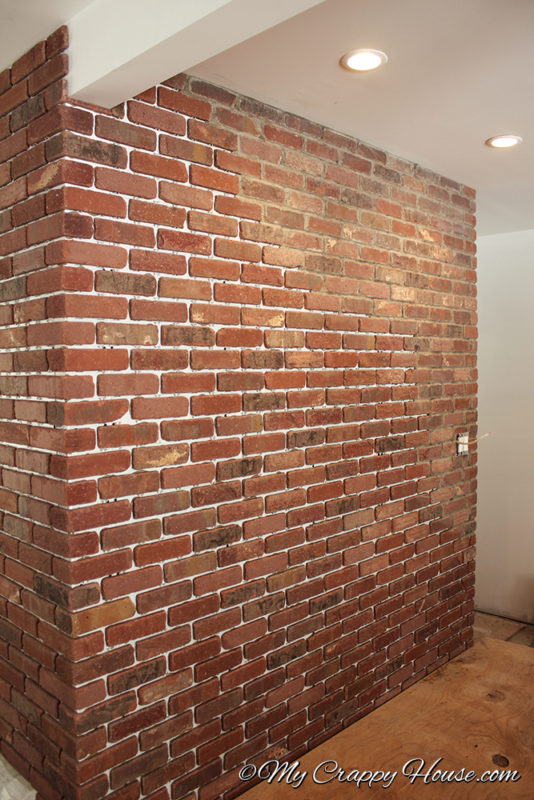
And here are some close ups…
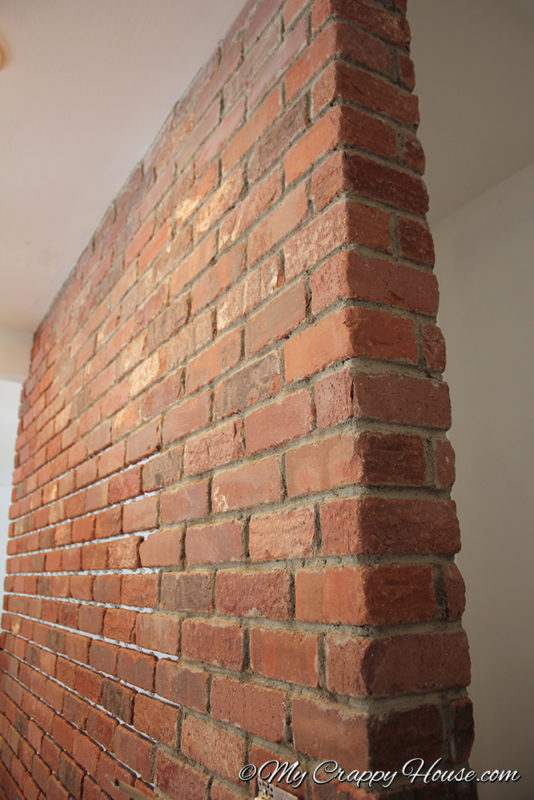

Mortaring took about 104 days. 101 days to look at the wall, contemplate the wall, think about the wall, observe the wall, reflect upon the wall… and 3 days to actually mortar the wall. Lazy. Sloth. Girl.
If I had thought of it in time, I would have made a video of the brick installation. I didn’t. So, instead, what you get to see is the entire mortaring process in under 3 minutes. It’s not as exciting, but things can be entertaining in super speed. Plus Egor makes a few appearances. I especially love the one at 2:35.
There’s definitely a learning curve. I got much faster by the time I finished. Now I think I could decorate the crap out of a concrete cake.
So, here it is! The big reveal! My beautiful brick wall! Tada!
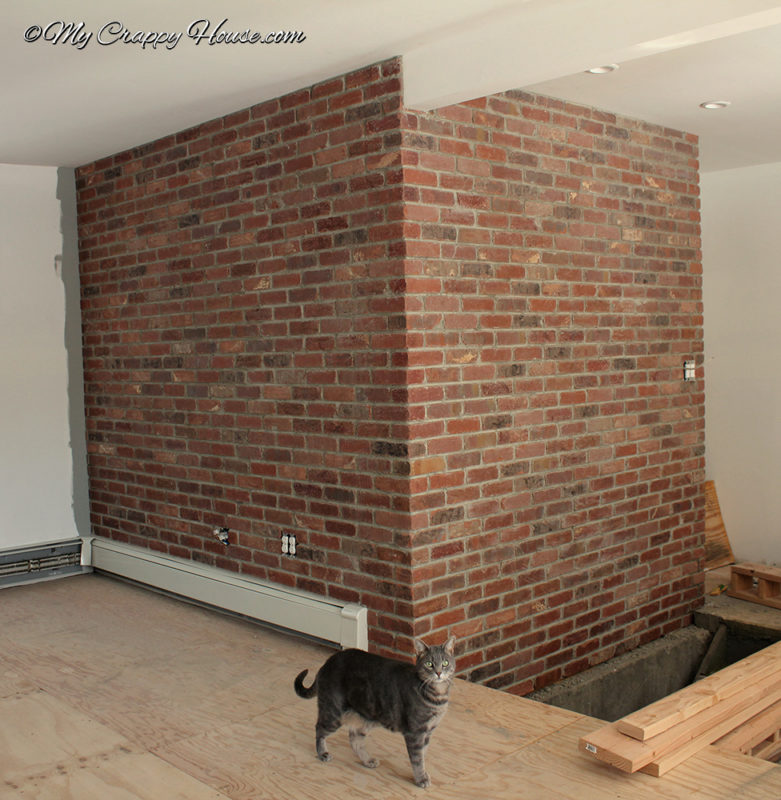
It was a real bitch to install, but I love it. So does Egor. I couldn’t have done it without him. (Of course I could, but he likes when I give him credit.) I’ll give you credit if you subscribe and like and share and all that social network crap. It really helps me out. Thanks!


71 Comments
Carol D
WOW! That is beautiful. I love brick inside. Now, do you think I could get my husband to do a wall???
My Crappy House
Thank you! Maybe you could, but who needs him? You can do it yourself
Sylvia
Wow…what a great job. The wall is beautiful. You are amazing and fearless. I’d never think of tackling a job like that.
How are you going to address the basement stairs?
I know you have a plan. I’m pinning your post. Maybe it will bring you lots more subscribers
Sylvia
me again…I just clicked back to Brick Love, Part I….WOW you do have a great plan for those basement stairs…and everything else. Beautiful. You’ll get there…I can feel it.
My Crappy House
Thank you! Yep, I’ve had my plan from very early on. It’s just taking a reeeeeally long time to implement it. Thank you for the pin! The next big job will be those floors…
Faye Libler (MacGIRLver)
The walls look fabulous! I am not usually a fan of “new” brick but your looks like it’s been there forever! Congratulations on a job well done!
My Crappy House
Thank you! I’m not a fan of new brick either. I made sure I got a vintage looking brick and my lack of experience with mortar actually worked to my advantage – it’s got a lot of character.
Brian Smingler
Your brick job looks fantastic, it was worth the wait gives the place a lot of character. Also looks like a pro did it.
My Crappy House
Thanks, Brian! I’m so happy with how it turned out
Filipe Silva
Hi, i luv to do one wall in brick, where go buy meterials brick and panel? I in Europe, Portugal
Thanks
Margaret A. Johnson
Fabulous job!!!
My Crappy House
Thanks, Margaret!
Susie
Loved the video! How much did you have to pay Egor for the cameos?
My Crappy House
He’s not union, so I just give him treats
Marie Mueller
Looks Great V!!!
My Crappy House
Thanks!
Kami
It looks fantastic. I love the fast forward video of you too, and the picture of Egor. He got so big!
My Crappy House
haha he’s huge now! Thanks
Lizz
Great wall!! Where did you get the special tabbed sheet metal?
My Crappy House
Thank you! I bought all of my supplies, including the sheet metal, at a mason supply near my house. If you happen to live on Long Island, the place is called All County Block & Supply. They were a big help there.
Haley Richmond
What is the name of the tabbed sheet metal product you used?
My Crappy House
There was no brand name that I know of – I got it at my local masonry supply. Click here for a photo you can print and take to your local supplier. I would imagine they’d either have it or know how to get it for you.
Kathy t
My goodness your brick wall is gorgeous !
My Crappy House
Thank you so much
Sarah
AMAZING. BRILLIANT. ASTOUNDING.
You are the bomb for getting that done. It looks so professional and like it’s been there for eons. You have my awe and admiration. I bow down to you, madame!
My Crappy House
Wow! Thanks for such high praise! You gave me a smile to start my day
Emily
I have been wanting to do this on a wall in our living room but thought it was way too ambitious. You have re-inspired me! Thank you!
Are you comfortable sharing how much (ballpark) this project cost?
My Crappy House
I won’t lie – it was my most difficult project to date. But if I can do it, you can do it too! The two walls I bricked totaled about 130 sq feet. My cost for all supplies was around $2000. So that’s almost $16 a square foot. I live on Long Island where everything is expensive, so if you live in a more reasonable area, you might do better on cost. Thanks for visiting my crappy house!
Eldean
Very nice. I just have one comment that will help it look more like a solid brick wall. Remove the thin piece of brick under the beam and about 1 to 1 1/2 bricks back from the face of the beam. Then add to the bottom and the face of the beam so it looks like the beam is sitting on the corner of the wall. See the link for what it should look like.
http://www.samlindsey.com/images/Excursions/Seneca/SenecaSCM-007.jpg
My Crappy House
Thanks for the suggestion! That looks really cool, but a little too rustic for me.
Royal
I am so impressed with your work here. This particular brick veneer looks really authentic. Please share the brand name/style/model number, if you don’t mind. Thanks!
My Crappy House
Thank you! I used “Townsquare” by General Shale. Here’s the link – they have a lot of different styles to choose from. https://generalshale.com/products/old-brick-originals-thin-brick/
Jessica Warfield
This looks stunning! Thank you for the tutorial!
My Crappy House
Thank you! I’m glad you liked it
Trevor Caulkins
Love this idea. Can you comment on the sheet metal? What is it called, and where can you find something like that? We just bought a condo and would love to do something like this I think. Thanks!
My Crappy House
Thanks! I honestly don’t know the official name. I bought it at the mason supply where I bought my bricks. I would imagine that any masonry would be familiar with this method of installation and would be able to order the sheet metal you need. Good luck!
aimee
It may have taken you 104 days…but it was definately worth the wait….your vision is going to be a stunning reality! Can’t wait to see it!-aimee
My Crappy House
Thank you. I’m hoping to get my lazy ass in gear this summer!
temp2escape
i found thislink for the metal sheet tab:
http://www.tabswallsystems.com/install2.html
My Crappy House
That’s not exactly what I used, but close. It might work! Thanks for posting the link for everyone
K.
What a lot of work! You must be very fit and strong. How did you know that you need to buy sheet metal to put over the wall the way you did? I’m impressed by the amount of effort you put in and how it looks afterwards.
By the way, the guy Eldean who told you how you could make your beam look like it was resting on the brick instead of floating on it, somehow, was telling you how to make it look more realistic, I think. Not telling you to use those crumbly wooden beams beneath.
My Crappy House
Hi there! I learned all about the sheet metal at the stone yard where I bought my bricks. I was planning to glue the bricks directly to the wall and he explained why that was a bad idea. Having worked with sheetrock already, he made a lot of sense. If the paper starts peeling, it’s all over!
I do see what Eldean was saying – I prefer the look I have though for two reasons. 1, Aesthetically, I think it looks cleaner. And 2, I am DONE! There’s no going back now
karon field
“You go girl!” Looks fantastic! They keep saying, brick is its on the way out”, but someone needs to tell “they” they are wrong! Thks for sharing.
My Crappy House
I never listen to “they”…
Making Spaces
Found your blog after a Pinterest sesh. Slightly obsessed with interior brick walls. This post gave me hope. I also got to see pictures of your cat too. Bonus gift.
Thanks for taking the time to write this, alongside actually doing it. I will be writing a post about interior brick walls soon so shall be sure to give you and your blog a shout!
Do you still love the wall as much a year down the line, and how is it holding up?
Cheers
My Crappy House
Hi! I don’t know what happened in Pinterest world, but I’ve been getting a lot of new visitors from there as of late. Pretty cool! So, anyway, YES, I still love my brick wall and YES, it’s holding up beautifully. I am even toying with the idea of continuing the brick down into the basement. I love it that much
Leila
What specific brand is your sheet metal and where did you get it?
My Crappy House
I got the sheet metal at my local masonry supply. It was sold by the sheet, not in a box, so I don’t know the manufacturer, but here’s the website of my supplier. You can call them and ask. They should be able to steer you in the right direction. Good luck!
http://www.allcountyblock.com/
Hilary Banks
This question has probably been asked and answered several times over …but where did you get the metal sheet from?
Hilary Banks
Ok never mind.., the very comment before me asked this question lool
Sandra McKenzie
Take a bow!!!!!
My Crappy House
Why thank you
Martha
Hey Kiddo,
Are those full size bricks or brick veneers? Brick veneers
show being glued to the wall with mastic. I am getting the mold to make my own brick veneers, only way to afford it:)
My Crappy House
I love when people call me kiddo! It gives me the exact opposite feeling I get when people call me ma’am.
This is brick veneer – AKA thin brick. It’s real brick, but only a 1/4″ thick. This installation was SO MUCH WORK, I can’t even imagine making my own bricks too. You must be a little bit cray cray…
patrick
Wow…what a wonderful job- I am truly inspired to do this myself!
One question: The corner bricks(the starting bricks) are they different than normal bricks?
My Crappy House
I hope you do! It’s a very rewarding project when it’s all finished. Yes, the corner bricks are “L” shaped and you rotate them 180 degrees every other brick. My phone won’t let me paste a link, but Google “thin brick corners” and you’ll see what they look like. Good luck!
desiree
Hi,
I was just wondering what the permanence of this installation is… are you able to just take the brick/metal off pretty easily with no damage to the wall? I wonder because I don’t own my home and don’t want to mess it up, but removable brick wallpaper looks too fake… thanks!
My Crappy House
This is a pretty permanent installation. I wouldn’t do this in a rental unless your landlord was willing to let you upgrade knowing it would stay even after you leave. It’s also a pretty big financial investment to make on someone else’s property. Sorry
Vicki
I am so amazed! You did a wonderful job! We tried to patch an existing brick patio and it doesn’t look half as good as this!! You got to come by my house and show me some tips ;). Keep up the good work!
My Crappy House
Haha you got it! I’ll be right over…
Synthya thompson
You posted a picture of a purple and gray bathroom that was stunning with a clawfoot tub in it I’ve just recently had my builders build me that bathroom and I’m almost ready for paint can you tell me where you got the purple and gray paint from …what color is the purple paint I’m having a hard time matching it? Thanks!!!!
My Crappy House
Hi there. Unfortunately, I don’t know what color that is – it’s not my bathroom. That was an image that I just liked from Pinterest. I tried a reverse image search, but I got WAY too many hits for me to follow, but you can do one and, if you have the patience, maybe you’ll get lucky and find where the picture is originally from and they’ll have a color for you. Here are instructions for how to do that if you don’t already know. https://support.google.com/websearch/answer/1325808?hl=en
Synthya Thompson
Thank you for getting back to me quickly that was super sweet of you!! I will try that reverse look up I’ve never done it before thanks for the web site suggestion.
My Crappy House
No problem! I hope you find it. I’ve been in your shoes many times trying to hunt down colors… Good luck!
Olga
The wall is so cool!
But what i lke more is your cat’s name! Egor)) It’s a popular russian name, and souds very seriosly. I have a couple friends, named Egor, they are all groun, serious dudes with beards) And now your cat! I look at him, it seems he told me “Yes bitch, i’m Egor. Kiss my fluffy ass”:)))
My Crappy House
lol that totally sounds like something he would say! I got him from a shelter and they had named him Egor. I thought he looked like an Egor, so I kept the name. He’s a bad ass…
Lena Stein
Love your blog! A couple questions…How did you cut the metal sheet for the outlets, etc? I also see a little gap in the corner where there are a few inches without the metal sheet-did you have to fill that in with a skinny piece of metal sheet? Thanks so much! I love that you posted this and just subscribed here and liked you on fb
My Crappy House
Hi! Welcome! I actually couldn’t remember about that gap, so I checked the pics. I did cut a skinny piece of metal, but it didn’t go all the way up to the top. I must have just used spacers for those last few on the corner that didn’t have the metal behind them. I used regular tin snips to cut my pieces to size (and around the outlets). It wasn’t easy, but I bought a rather large pair for the job, so it was manageable. Honestly though, if I never have to cut metal again, I’ll be happy! Thanks for subscribing
Melody Brass
Im looking for something to assist in mounting REAL reclaimed brick (not veneer) to interior wall. Any of the sheet metal products that Ive seen are all for veneers. Any insight? TIA
My Crappy House
I’m not actually qualified to give you real advice. That said, I would imagine full bricks would support themselves from down pressure, but you will definitely need to tie them to your wall somehow. With full bricks though, you’re dealing with a LOT of weight. You’ll need proper support from below as well. I would talk to your local masonry supply and perhaps an engineer. If you don’t do this right, it could be a disaster. Good luck!
Bricks Street
thanks for sharing this amazing piece of content with us. Keep it up with good work